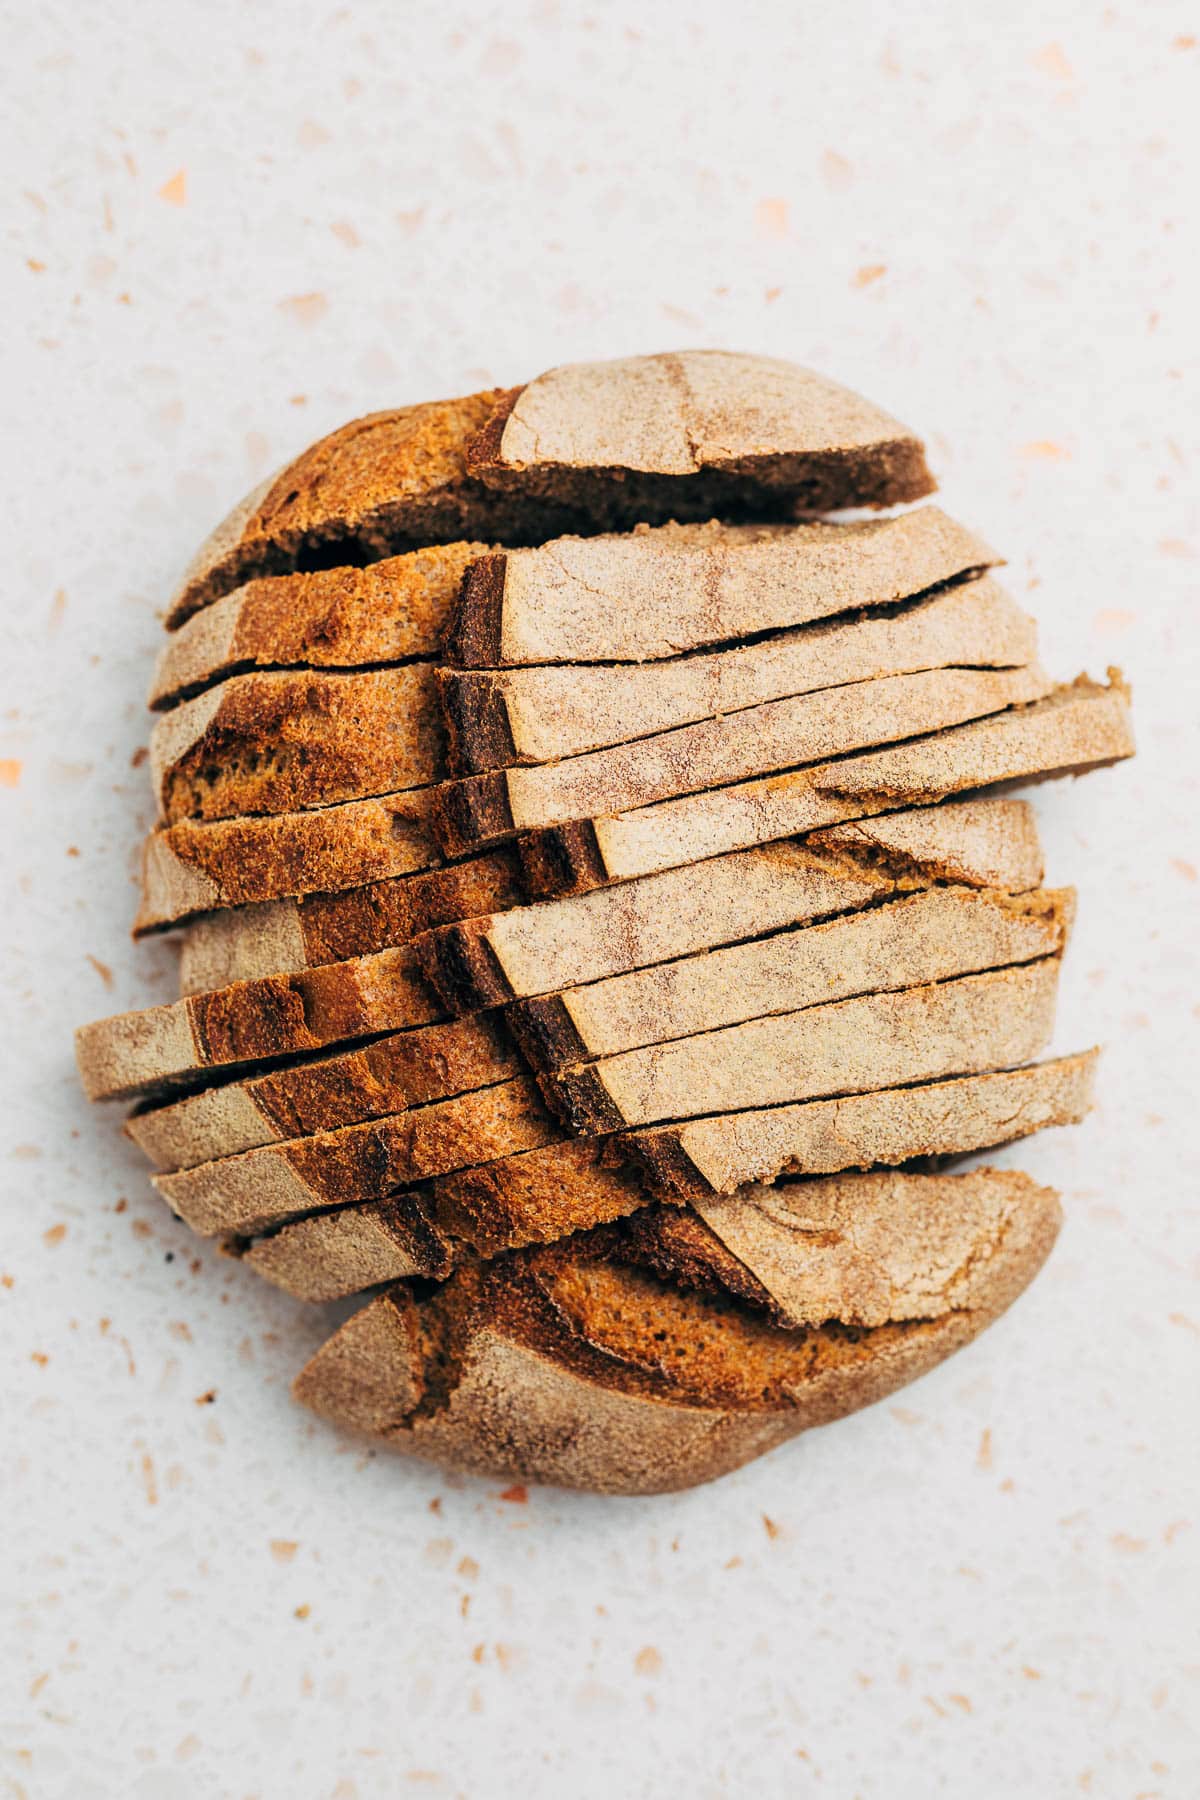
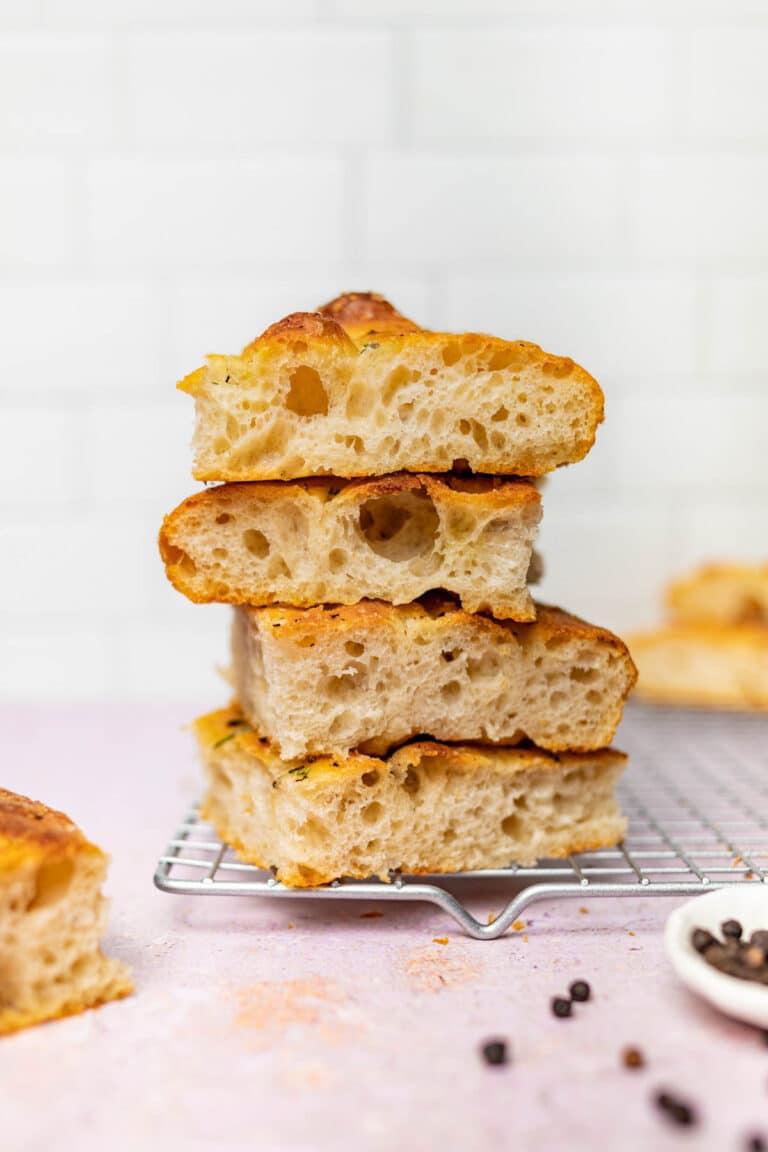
A simple 4-ingredient 100% whole wheat sourdough bread, made with purely whole grain flour. It's a delicious, flavourful, and wholesome loaf! Using all whole wheat flour makes for a nutty, ultra-flavourful loaf, and one that can really hold up to any toppings you can throw at it. Strong cheese, spicy jams, cured meats - anything that might overwhelm a white-flour loaf.
We first shared this recipe in 2023. It’s been updated with more helpful information and improvements to the recipe instructions.
Recipe Rundown: Whole Wheat Sourdough Bread
Prep Time
15 minutes
Bake Time
45 minutes
Resting Time
18 hours
Servings
1 loaf
Difficulty
Intermediate
Calories
157 kcal*
Primary Ingredients
Sourdough starter, whole wheat flour, water, and salt.
*Calories are an estimation.
How This Recipe Works

Every sourdough baker should have a good whole wheat sourdough bread recipe in their repertoire, and this is mine. It makes a tasty, hearty loaf and is one of my standard recipes to make as part of my weekly rotation.
I trained and worked in artisan bakeries in Victoria for a decade before I started sharing recipes, and this method of a cold ferment in the fridge after shaping is one that I learned during that time. It's similar to the Tartine method and while it's not necessarily something you might often see on other recipe blogs, it's a great bakery method that we use for almost all of our sourdough bread recipes here on the Baked Collective. You'll see that it's used here, too.
I developed and wrote this recipe, and have been making it for years with various types of whole wheat flour. It's a lower hydration loaf, keeping in mind that whole grain flour absorbs more water than white flour, which makes it easier to work with but doesn't sacrifice the oven spring.

One reader, Alex, commented: "Fantastic recipe! Been looking for a whole wheat recipe but everything I tried was high hydration and beyond my meager skills. Followed these to a T and now it's in my go to for weekly bread. Thanks!"
Another reader, Zori, said: "First time I managed to bake the perfect sourdough following this recipe step by step. I've added some seeds to add a bit of fibre and texture as well. Yum!"
Ingredients You'll Need and Why
Basic sourdough is made with just flour, water, salt, and starter. The only difference here is the use of all whole wheat flour, and a slightly altered method to account for that. These are our notes from recipe testing and you can find the full recipe card below with complete measurements and instructions.

- Whole wheat flour: this can be store-bought flour or ground in your home mill if you have one. If you don't feel confident with all whole wheat flour, you can certainly sub in some all-purpose or bread flour to the mix. We love red fife wheat flour here, for a really excellent flavour, but any kind of whole wheat will work. Replace up to 250 grams of the flour with white or bread flour for an easier-to-work-with loaf.
- Sourdough starter: active starter that's well established and ready to use for full loaves. If your starter is less than two weeks old we generally recommend using it for discard recipes instead, and then baking loaves once it's a little older.
- Water: if you know the water in your area is heavily chlorinated or not great quality from the tap, use filtered water to bake bread. Otherwise tap water is fine.
- Salt: don't skip, reduce, or increase the salt amount, and use fine-grain sea salt or table salt (not coarse salt). This goes for any of our sourdough recipes. Any time you're baking bread, keep in mind that salt is key to gluten development and adjusting it will impact the recipe.
Use the JUMP TO RECIPE button at the top, or scroll to the bottom of the post to see the printable recipe card with full ingredient measurements and complete instructions.
How to Make Whole Wheat Sourdough
This dough will probably seem too stiff at first, especially if you're used to working with higher hydration white flour loaves. It's normal and how the dough should feel. You'll find that it relaxes as the dough hydrates, especially during the autolyse period, and will rise nicely if fermented correctly.
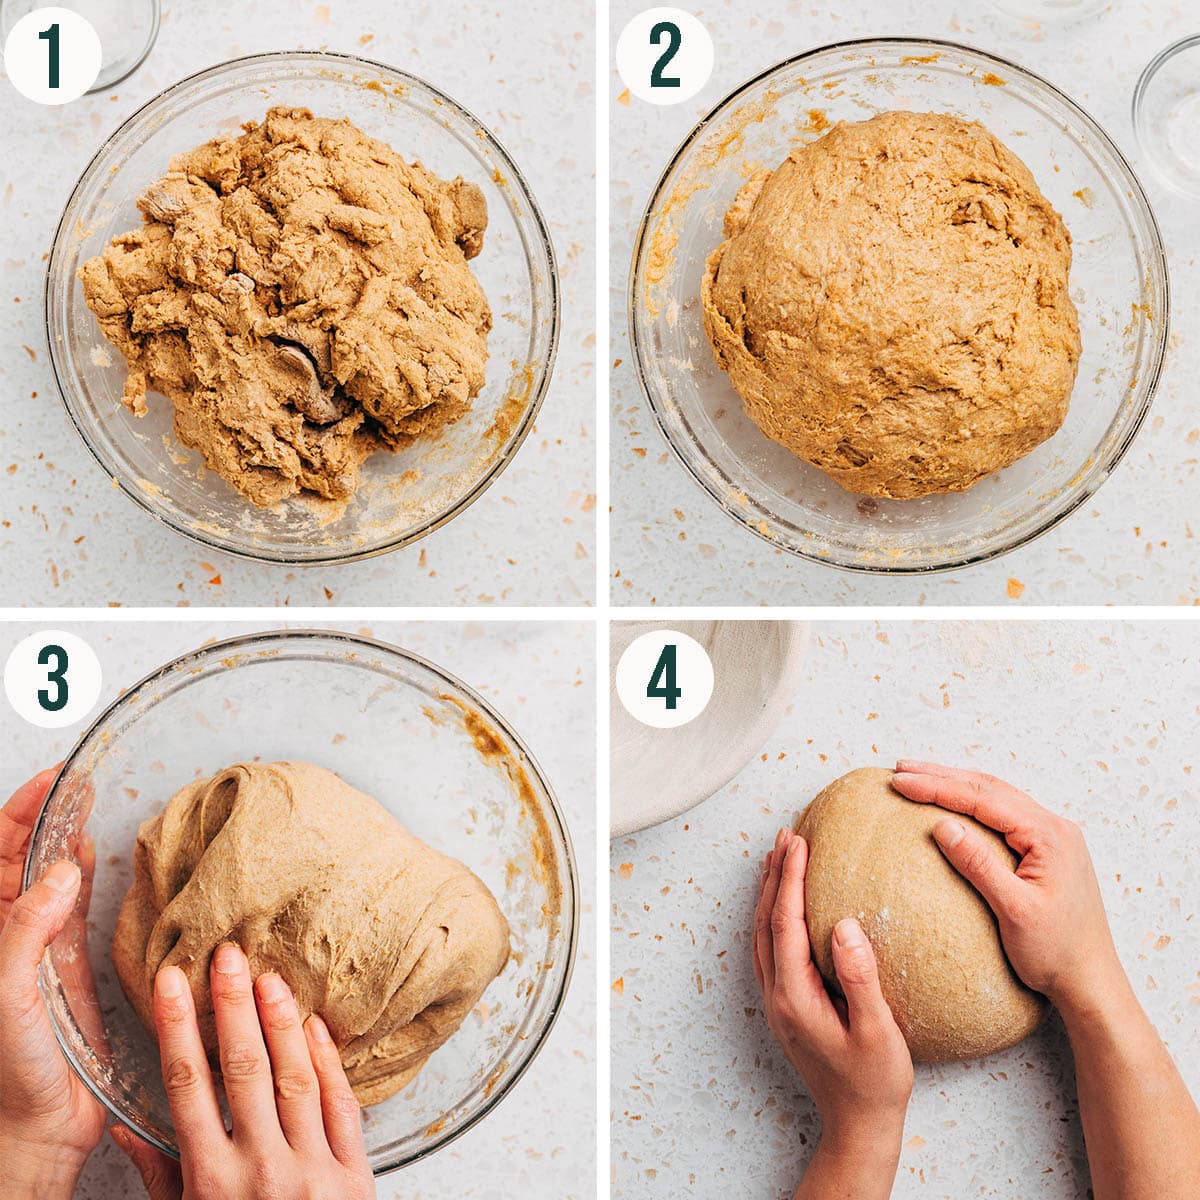
Step 1: mix the water, starter or levain, and flour. Set aside to autolyse, or rest, to let the flour hydrate. This makes a big difference, especially with whole grain loaves, and can't be skipped for this recipe. You'll probably need to mix with your hands to ensure the dough is evenly mixed.
Step 2: mix the salt and remaining water in with the dough and let it rest again. This is a little more resting than we usually include in our sourdough recipes and that's due to it being a whole wheat sourdough without any all-purpose or bread flour in the mix.
Step 3: do six rounds of stretches and folds, one every 30 minutes. We recommend sticking with stretches and folds for this recipe, instead of kneading, to let the dough hydrate between each round of stretches.
Step 4: shape the dough into a boule. There is no separate bulk ferment for this recipe before shaping, which is the bakery method we usually use. It is important to let the dough rest again before shaping to avoid tearing.
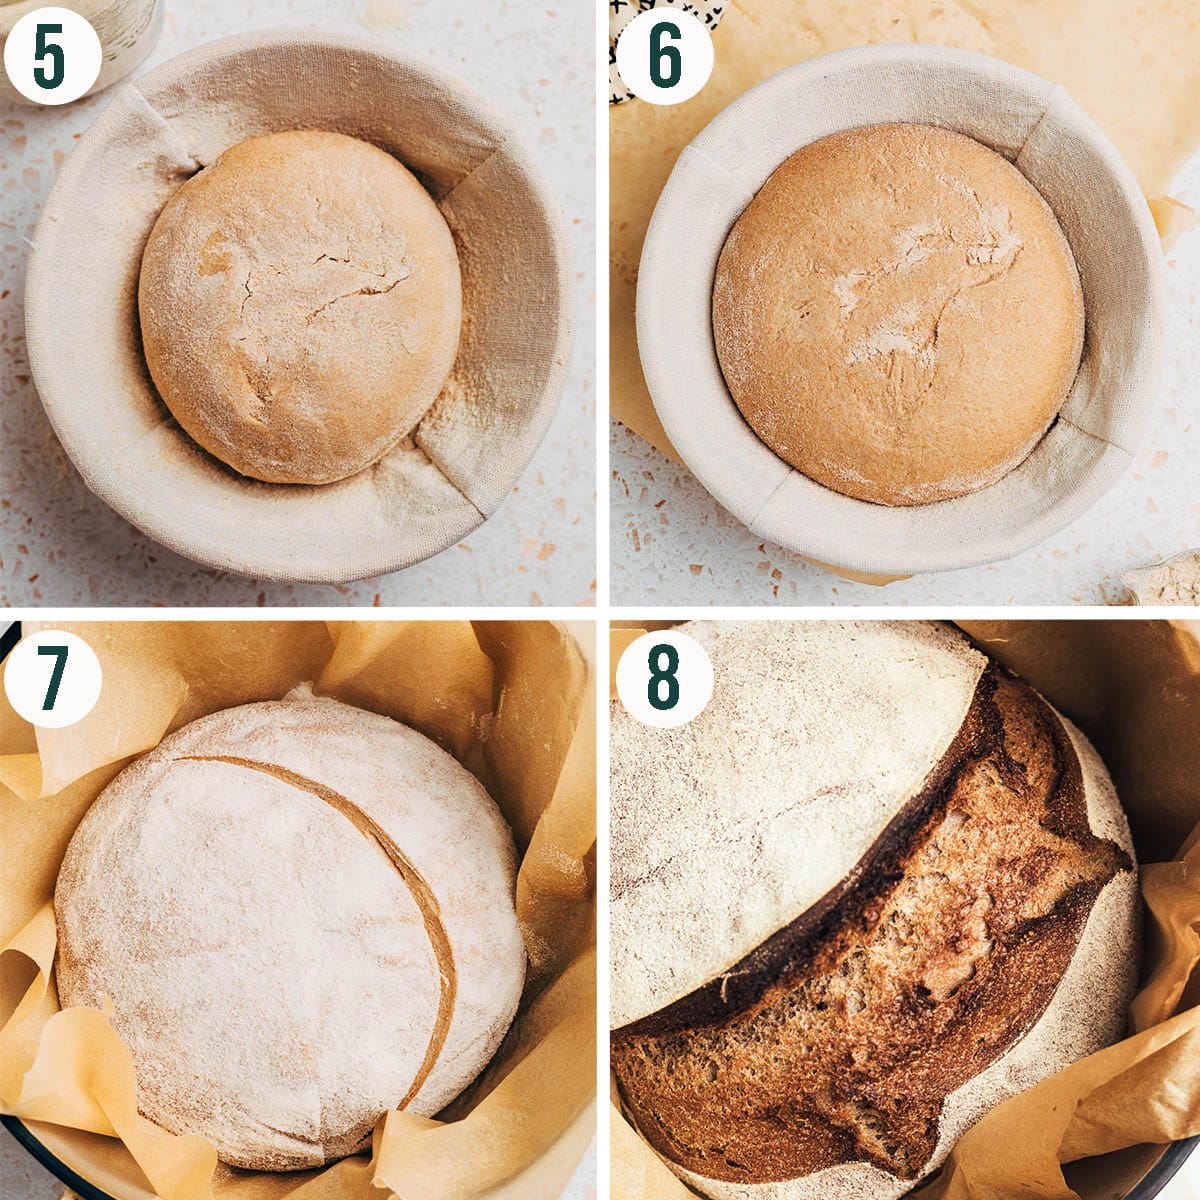
Step 5: place the dough seam-side up in a lined and lightly floured banneton. If you don't have a banneton, use a round bowl instead. See our guide on essential sourdough tools.
Step 6: refrigerate the dough overnight. It should approximately double in size. Important: if the dough has not doubled and doesn't look as pictured here, you must let it rise for a longer time before baking. Proving times needed for sourdough vary depending on a number of factors and you should use your senses to make sure a loaf is ready before baking.
Step 7: turn the dough out onto parchment paper and carefully place into a preheated dutch oven. For the most even rise and tidiest loaf, score before baking. If you don't have a knife sharp enough or don't feel confident scoring, you can skip this step and let the bread open where it likes.
Step 8: bake the loaf for 45 minutes, covered and then uncovered, and cool fully before slicing. We haven't tested this recipe with an open bake but you can bake in a loaf tin if preferred. If you know your loaves are usually a little too dark on the bottom, place the dutch oven on a thick baking sheet in the oven or move it up one rack.

Expert Tips for the Best Bread
- Let it rest: as with any sourdough bread, it must cool completely before slicing to avoid gumminess. With whole grain recipes, this is even more important, and we encourage leaving the loaf for at least 12 hours before slicing. If you slice too early you will have a less pleasant texture.
- Don't skip the autolyse: leaving the dough to rest before adding the salt is an autolyse. This allows the whole grains to soak up some of the water and makes for a dough that's much easier to work with. It's especially helpful when working with whole wheat sourdough.
- Bake it without a dutch oven: you can bake whole wheat sourdough in a bread tin if you prefer. Follow this recipe, but use the shaping and rising directions for our sourdough pan loaf, if you don't have a dutch oven or prefer a square slice.
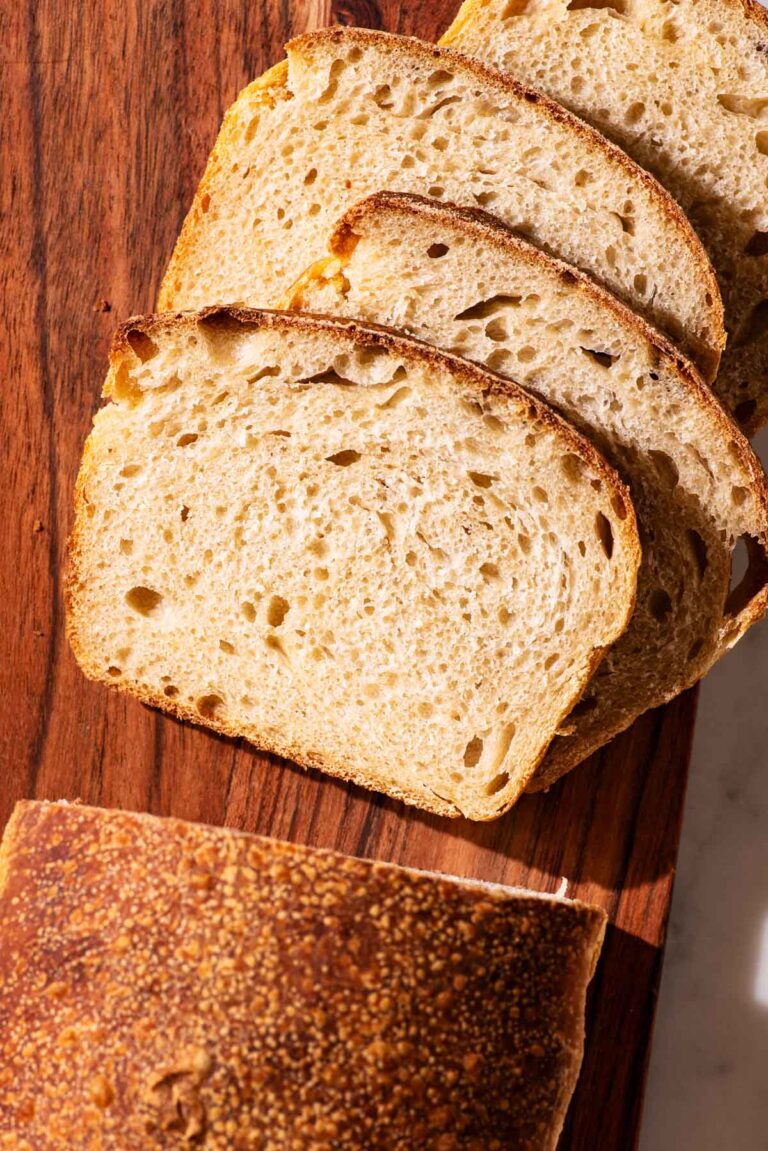
- Don't expect a very light bread: this loaf isn't as light and airy as an all white flour sourdough bread, due to the bran content cutting the gluten strands. If you like a slightly denser loaf, with a tighter crumb (great for sandwiches!) this is your bread.
- Don't be discouraged: this recipe isn't more difficult or advanced compared to a purely bread flour sourdough, but it will result in a different loaf. There won't be as a great of an oven spring and the bread won't be as tall - these are typical for whole grain loaves and definitely not a bad thing.
- Add mix-ins: try adding some nuts or dried fruits to the mix after you've made the loaf once or twice. Cranberries, raisins, walnuts, or anything like that is great with the more complex flavour in this recipe! You can reference our other sourdough bread recipes with inclusions for notes on amounts needed.
More Sourdough Bread Recipes


If you make this Whole Wheat Sourdough Bread recipe or any other sourdough bread recipes on the Baked Collective, please take a moment to rate the recipe and leave a comment below. It’s such a help to others who want to try the recipe. For more baking, follow along on Instagram, TikTok, and YouTube.
Whole Wheat Sourdough Bread
Equipment
- Mixing bowl
- Whisk
- Tea towel
- Measuring cups and spoons or a digital kitchen scale
- Dutch oven
- Oven mitts
- Wire rack
Ingredients
- 100 grams sourdough starter, or levain
- 500 grams whole wheat flour
- 350 grams water, (20°C/68°F)
After autolyse
- 25 grams water
- 10 grams fine salt
Instructions
Two Nights Before Baking
- Make the levain:Take out about 1-2 tablespoon of your starter from the fridge place it in a bowl. Mix with 50 grams of room temperature water and 50 grams of flour (sifted bread flour, whole grain, spelt, or a combo - whatever you prefer as long as the flour to water ratio is 1:1).
- Cover the bowl with a plate and leave it on the counter to ferment overnight for approximately 8-12 hours. For more information, see this post on how to make levain. If you're starting this recipe with starter that's already active and ready to use, skip this step and move right to mixing the dough.
One Day Before Baking
- Once your levain is ready, combine all of it with 350 grams of water. Add the flour to the water mixture and, and using your hands, mix to combine.100 grams sourdough starter, 350 grams water, 500 grams whole wheat flour
- Once the dough is mixed, cover with a tea towel and let it sit at room temperature for 40 minutes to rest. This is an autolyse and is important to hydrate the whole wheat flour.
- After the elapsed 40 minute of resting time is up, add the salt and remaining 25 grams water. Mix well until combined then cover with the tea towel and let the mixture rest again for 30 minutes.25 grams water, 10 grams fine salt
- After 30 minutes, it is time for the first fold.
- Do the first fold:To do this get your hands damp and reach under the dough on the opposite side of the bowl from you. Pull the dough up and over towards you. Repeat this so the side closest to you folds over to the side away from you and the side on your left folds towards you right, and your right folds towards your left. Think of it as wrapping a package. Then, scoop your hands under the ball of dough and flip it over completely. This completes one “fold”.
- Complete 6 more folds (one fold every 30 minutes) for 3 hours total.
- Shaping the dough: Begin by taking the dough out of the bowl and letting it rest on the counter for 20 minutes. Meanwhile, prepare your banneton by dusting it with flour, or layer a clean tea towel in a medium mixing bowl and dust liberally with flour (50-50 wheat flour and rice flour is a great dusting combo).
- Shape your dough making sure you get as much surface tension as possible without tearing the outside of the loaf. Once shaped, turn the loaf into the lined and floured bowl or banneton (top-down, seam side up). Gently flour the top (previously the bottom) of the dough before covering with the edges of the tea towel. Set in the fridge overnight.
Baking Day
- The next day place your dutch oven in the oven and preheat to 260°C (500°F) or as hot as your oven can go, but no higher than 500°F. After the oven has come to temperature, let the dutch oven continue to preheat for another 30 minutes.
- Once the dutch oven has been preheated, take your bread out of the fridge. Gently invert the dough onto a piece of parchment paper that will be large enough to lift your bread into and out of the dutch oven. Gently score the bread with a sharp knife or bread lame.
- Using oven mitts, carefully remove the dutch oven from the oven, take off the lid and then carefully lift the dough into the pot using the parchment paper.
- Using oven mitts, carefully place the lid back on the dutch oven and put the entire dutch oven back into the hot oven. Reduce the heat to 230°C (450°F) and bake for 25 minutes. Carefully remove the lid (be careful of steam) and bake for another 20 minutes with the lid off.
- Remove the pot from the oven and carefully lift out the loaf using the edges of the parchment paper and let cool completely on a wire rack.
Notes
Nutrition
Nutrition information is an estimate and is provided as a courtesy. For precise nutritional data, please calculate it independently using your preferred nutrition calculator.
This post may contain affiliate links. If you purchase through these links, we may earn a small commission, at no additional cost to you.
 Did you make this recipe?Please consider leaving us a rating and a comment. It helps others find our work, which genuinely supports what we do. Thank you!
Wow! My best loaf so far. Soft interior with nice crumb, nicely done and crusty shell. And even best overall rise mostly during baking. Definitely now my go to main recipe now, and probably use as basis to play around with too.
I definitely need to work on my bulk ferment schedule/timing/temperature overall and I think a big reason my previous bakes have turned out only OKish. So this recipe is also extra nice by not having to worry about that part.
Wow, I have been trying for quite some time to make a delicious whole wheat sourdough loaf. Finally, this is the one. Thank you so much for this recipe. It differs ever so slightly in a few key areas to those I have tried before and I'm so thankful to have found your site. I am in the USA and used AzureStandard whole wheat bread flour and followed all instructions as written. I did place a cookie sheet on the oven rack below the dutch oven to prevent over browning of the bottom of the loaf and I'm glad I did. I also needed to let the loaf rise more after cold fermentation. Those suggestions were excellent
Do you use commercial whole wheat or freshly milled wheat flour, and depending on what you use, do you change the amount of water?
Hi Lambert, we've tested this recipe with both, and also with store-bought freshly milled flour from Flourist. We don't change the amount of water. There will always be some slight variations but Sophie is in BC, Kelly is in Nova Scotia, and I make it with European whole wheat flour (from the grocery store, a local mill, or milled in my komo) - always with about the same amount of water give or take a few grams. In my experience the concern over hydration and amounts is due to incorrect measuring and is much less of a concern when measuring in grams. I would always recommend using flour that's as freshly milled as possible for the best taste but it will come down to what's available for you to purchase.
Fantastic recipe! Been looking for a whole wheat recipe but everything I tried was high hydration and beyond my meager skills. Followed these to a T and now it's in my go to for weekly bread. Thanks!
Could you convert the grams into cups/tsp/TB
Hi Natasha, we don't provide cup measurements for sourdough as they're so inaccurate, sorry!
This bread is excellent! I have made this recipe many, many times following it exactly and the loaves have turned out great. I have this bread toasted every day for breakfast and I'm so glad I found this recipe.
Thank you so much for the recipe!! I do half whole grain and half AP flour because I’m wanting to get my son to eat more Whole grains from freshly milled wheat. He says he likes them So that’s a plus. This is a stepping stone for my son. My husband and I love them!! Thank you.
Bread was very good. Nice sour flavor. It scored easier than any sourdough loaf I’ve made before. I always have trouble knowing how long to proof the bread. It was in the refrigerator about 14 hrs. I did the poke test and the poke slowly rose. The bottoms of my loaf was a little tough. What could be the problem?
Hi Gail, it's pretty common to have a bit of a tough base with whole grain sourdough loaves. You can try setting your dutch oven on a baking sheet and then putting it into the oven, and that might help! You might find this sourdough troubleshooting guide helpful too.
I followed the directions and my bread burned. I suggest a lower baking temp.
Hi Leah, did you remember to turn the oven down before adding the bread? If so, we suggest getting an oven thermometer as most home ovens are inaccurate.
What do you consider room temperature? 3 hours seems like a short bulk fermentation.
Hi Sam, this is Sophie's typical style for sourdough recipes, following the method of the sourdough bakery she worked in for a decade. The bread rises after being shaped.
Hi Leah, I'm new to sourdough, but I found when my bread burned it was because I only have a three and a half quart dutch oven. I learned they heat up much more quickly. I have had luck when I have reduced the temperature to 400° for the bake. However, that can affect the length of time the bread is baked, so I rely on a food thermometer. Hope this helps.
First time I managed to bake the perfect sourdough following this recipe step by step. I've added some seeds to add a bit of fibre and texture as well
Yum!