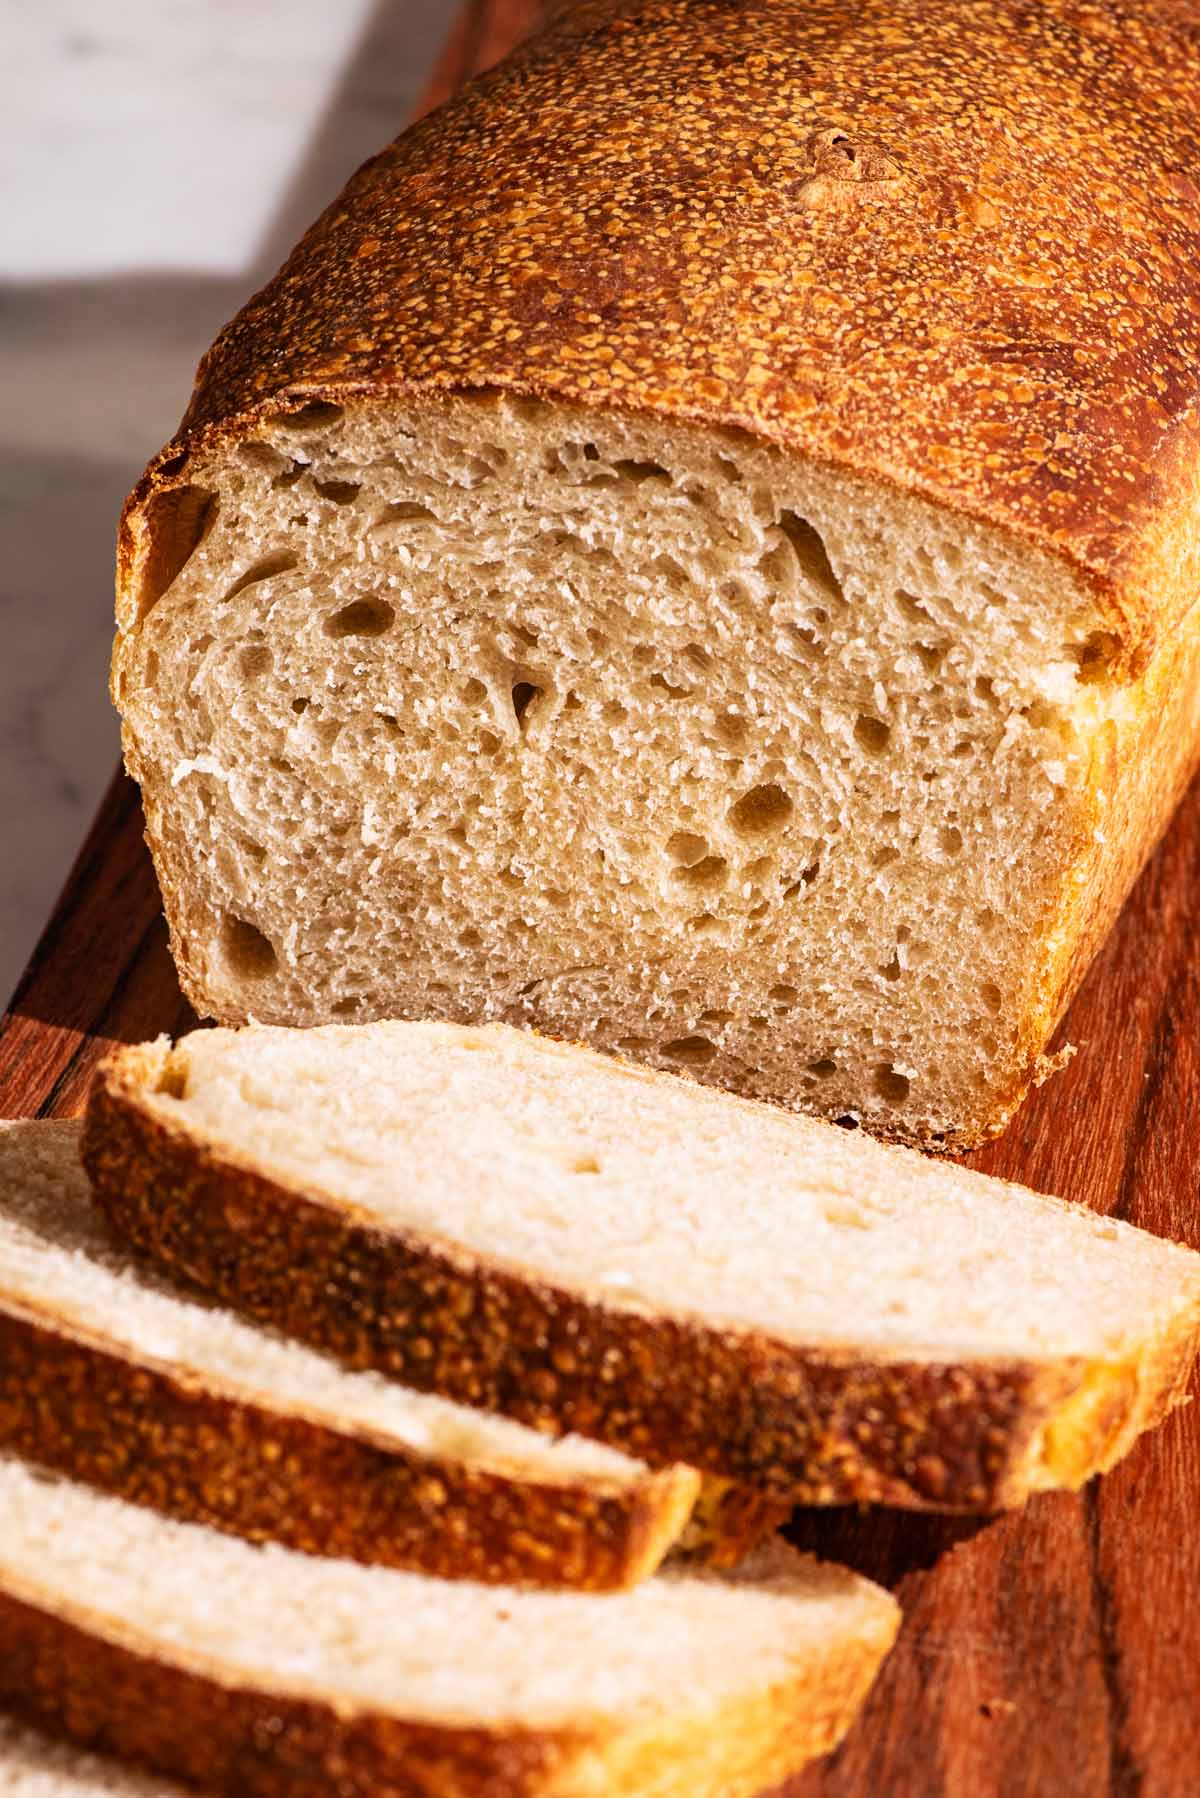
Sourdough sandwich bread is a soft, light loaf with a hint of tang. Perfect for your favourite sandwiches or morning toast and jam! Using a slow overnight ferment, this bread is baked in a loaf tin for that familiar sliced-bread look. This is a great recipe for beginners to sourdough, because you don't need a dutch oven and the shaping is a bit easier.

We first shared this recipe in 2023. It’s been updated with improvements to the recipe, all new step-by-step pictures, better instructions, and more helpful information.
Recipe Rundown: Sourdough Sandwich Bread
Prep Time
20 minutes
Bake Time
40 minutes
Rise Time
12 hours
Servings
1 loaf
Difficulty
Intermediate
Calories
199 kcal* per slice
Primary Ingredients
Sourdough starter, all-purpose flour, milk, oil, sugar, and salt.
*Calories are an estimation.
How This Recipe Works

I recently retested this recipe from scratch after trying the original version again and being unhappy with the result. This new sourdough sandwich bread is the perfect white sandwich loaf, with extra flavour from using 100% sourdough starter with no yeast, and a genuinely soft texture. After some feedback from readers over the years that some are uncomfortable with having eggs in long-fermented recipes I developed this version without eggs (but our highly enriched sourdough recipes do still include them!).
The ingredients are similar but the method has changed. This loaf is made using kneading rather than stretches and folds - both methods are outlined below if you prefer stretches - and this is because the texture is better with kneading. It also saves some time if you don't have a three or four hour block set aside in your day to prep sourdough bread.
It's not as light and fluffy as bread made with yeast, as will always be the case for naturally leavened recipes, but it is genuinely delicious. For a very fluffy loaf you can try our sourdough discard sandwich bread. If you want to bake strictly with sourdough and no yeast, this is truly the best sandwich bread around.

One reader, Michele, said: "This is the only sandwich bread that I have made that my daughter likes more than store-bought bread - a rare compliment from her. Thank you for sharing the recipe!"
Another reader, Joy, commented: "This recipe is easy, and the loaf is perfect for sandwiches!! Such a great recipe!"
Ingredients You'll Need and Why
Sandwich bread uses simple ingredients that most home sourdough bakers will already have on hand, and you don't need much to make an excellent loaf of bread. These are our notes from recipe testing and you can find the full recipe card below with complete measurements and instructions.
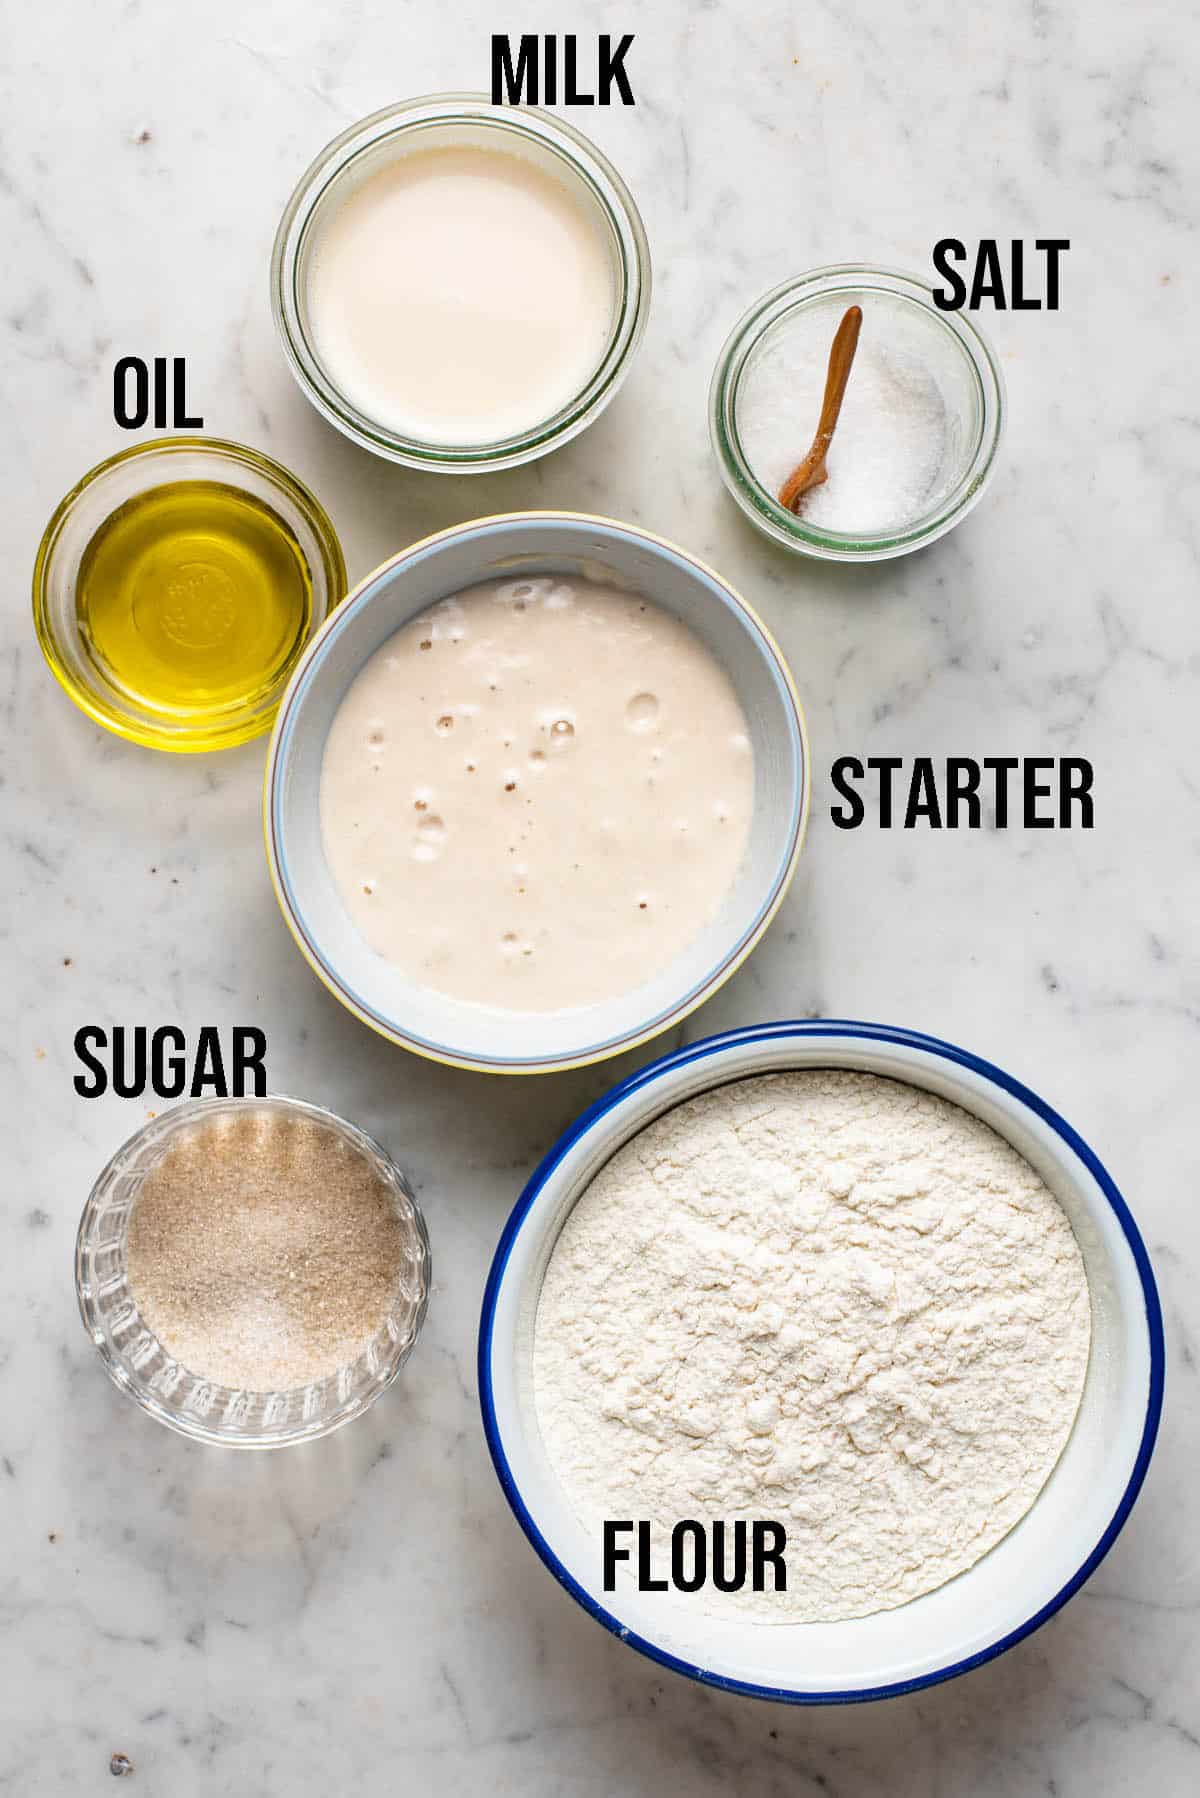
- Flour: white flour or bread flour is best to use for a light fluffy loaf. We use white all-purpose flour for convenience and prefer the texture of a slightly softer loaf. Feel free to substitute up to 50% whole grain flour like whole wheat, but note the texture and density of the crumb will change.
- Starter: this should be active 100% hydration sourdough starter or levain. Note that if your starter is young it might not be strong enough to make a full loaf and you're better off using it for discard recipes for the first couple of weeks.
- Milk: full-fat dairy milk will make for the richest bread, but any percentage of milk will be fine. If you want to use a non-dairy alternative, soy is best due to the high protein content (it makes for a stronger structure).
- Sugar: use plain white sugar, cane sugar, raw sugar, and so on. Honey is fine too but should be mixed with the milk first.
- Salt: don't reduce or increase the salt amount unless you know what you're doing - remember that baking is a science. The amount of salt is directly related to the rise and gluten development of the loaf. We recommend fine sea salt. If you only have coarse salt, grind it before use.
- Olive oil: substitute any other neutral or light-tasting oil you have on hand. Melted butter can be used but it will slow down the rise slightly.
Use the JUMP TO RECIPE button at the top, or scroll to the bottom of the post to see the printable recipe card with full ingredient measurements and complete instructions.
How to Make Sourdough Sandwich Bread
As with most sourdough bread recipes, patience is the most important element. If you rush either rising period, you'll end up with a dense brick. The timing depends on a number of factors (see sourdough troubleshooting) so it's best to look for visual cues: the dough should double in size after the first rise, and reach the edge of the baking dish after the second.
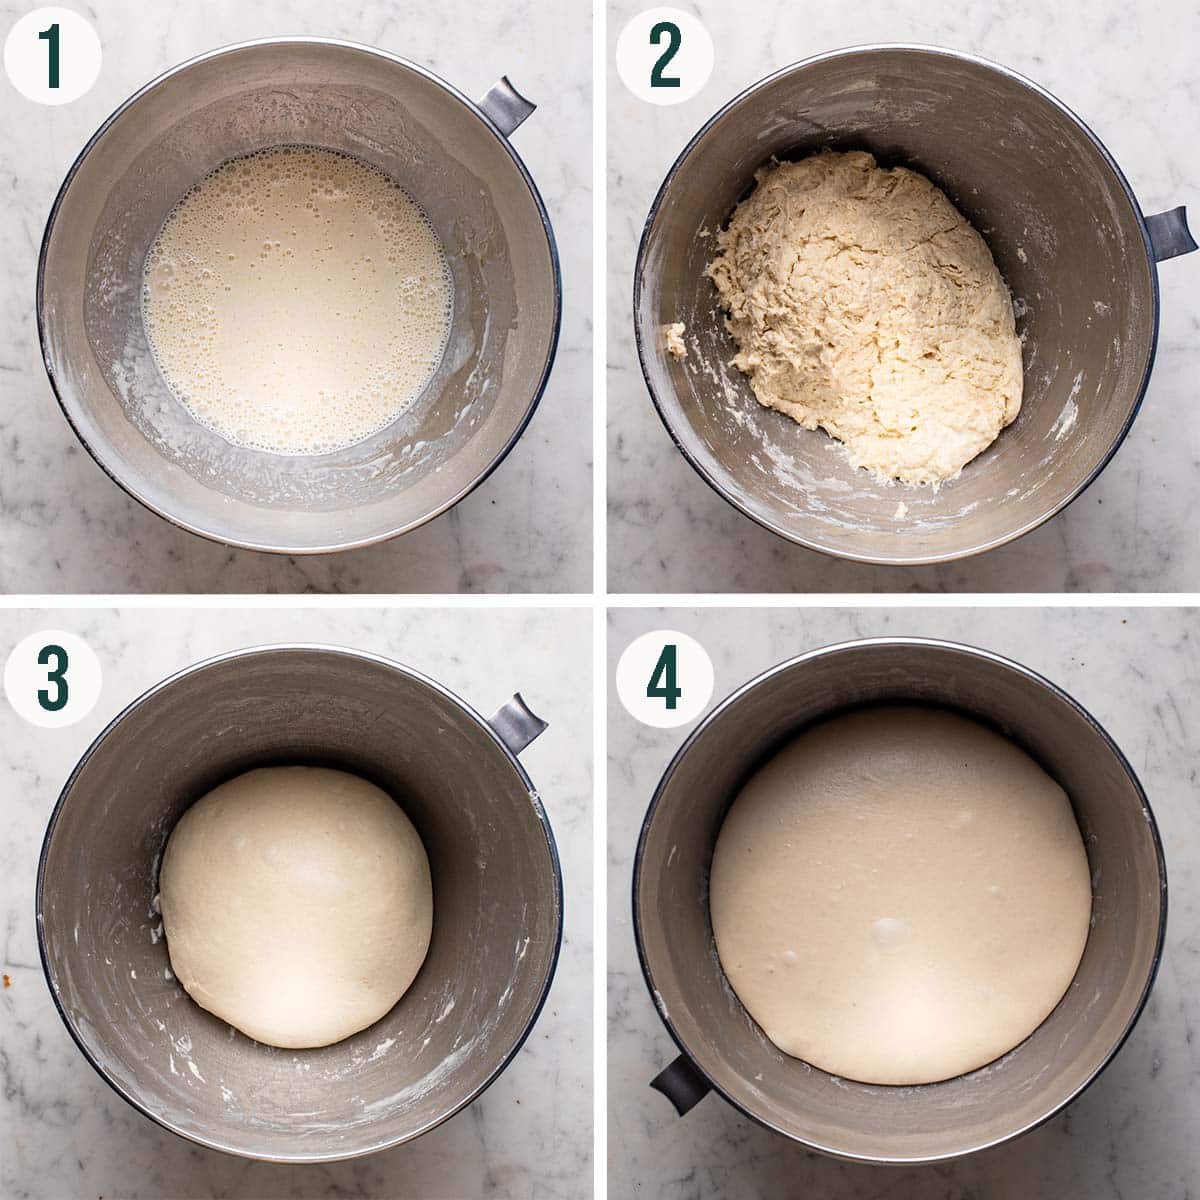
Step 1: add the milk, sourdough starter, and oil to the bowl of a stand mixer. If hand-kneading or doing stretches and folds, use a large mixing bowl. Make sure the milk is at room temperature (you can heat it slightly to warm it up if needed).
Step 2: add the flour, sugar, and salt and mix into a shaggy dough. It might seem a little dense at this point but it will relax and develop gluten as it's kneaded.
Step 3: knead the dough until soft, smooth, and elastic, about 12 minutes. Alternatively, do 4 rounds of stretches and folds over the course of 2 hours. The bread will be better if kneaded and is best in a stand mixer but can be kneaded by hand. Don't add any extra flour when kneading.
Step 4: let the dough rise at room temperature until doubled in size, usually around 8 hours. This has taken up to 14 hours for me when my home is cold in the winter so keep that in mind. If the dough is sluggish and you know your starter is strong, try boosting the rise by placing it in a warm spot, like the oven with the light on, to get it going.
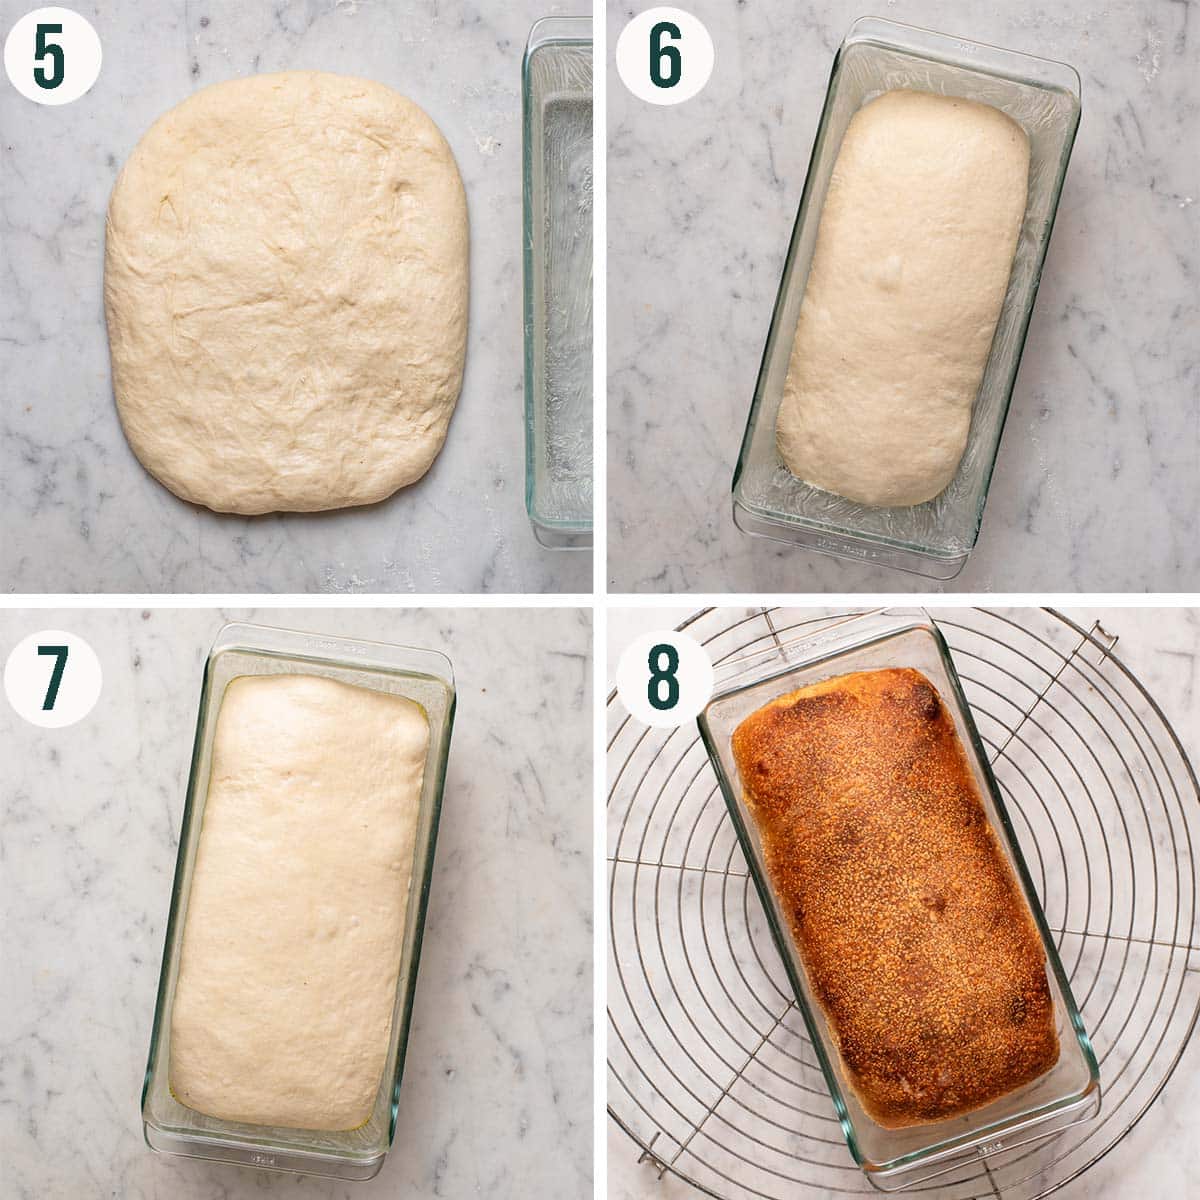
Step 5: turn the dough out onto a lightly floured surface - it shouldn't be sticky at all if correctly proved - and shape into a rectangle. The long edge should be the same length as your loaf tin.
Step 6: roll the dough into a tight spiral and place it, seam-side down, into a greased bread tin. This is a fairly small loaf so it won't fill up the container. I like glass but it does increase the baking time slightly compared to metal tins so if you also use glass or ceramic note that your loaf will probably be ready near the end of the baking time frame in the recipe card.
Step 7: let the dough rise until it just about reaches the edge of the baking tin (about 1cm below the edge of a standard 26cm (10 in.) bread form). You should see visible activity and the loaf will pass the poke test when it's properly fermented.
Step 8: bake until lightly golden, around 40 minutes. If you have a thermometer, the internal temperature should be around 90°C (200°F) when the bread is baked. Cool fully before slicing.
Expert Tips for the Best Loaf
- Do a longer ferment: if you prefer a tangier, more sour flavour, place the dough in the fridge for up to 24 hours for a longer bulk ferment. Note that the second rise will need more time if the dough is cold when shaped and you'll still need to make sure the dough doubles in size during the first rise.
- Cool before slicing: it's best to let sourdough bread cool fully before slicing to avoid gummy bread.
- Use room temperature ingredients: cold milk will slow down the rising time of the dough significantly. For a similar method with a non-enriched dough, try our sourdough pan loaf.
- Roll up the dough: try to get as tight of a spiral as possible to avoid air bubbles forming between the layers or the bread falling apart as it's cut.
- Use all-purpose flour: bread flour makes for a slightly chewier loaf, and all-purpose will make sandwich bread that's a bit more like that made with yeast (less chewy, more tender). This loaf is never going to be exactly like store-bought sandwich bread, but it's a great alternative.


If you make this Sourdough Sandwich Bread Recipe recipe or any other sourdough bread recipes on the Baked Collective, please take a moment to rate the recipe and leave a comment below. It’s such a help to others who want to try the recipe. For more baking, follow along on Instagram, TikTok, and YouTube.
Sourdough Sandwich Bread
Equipment
- Stand mixer or large mixing bowl
- Whisk
- Wooden spoon or spatula
- Tea towel and large plate
- Bread tin 26cm (10 in.) length ideal
- Wire rack
Ingredients
- 250 grams whole milk, room temperature
- 100 grams active sourdough starter
- 20 grams olive oil
- 400 grams all-purpose flour
- 30 grams granulated sugar
- 12 grams fine sea salt
- Butter, for greasing
Instructions
Day One: Mix and First Rise
- Add the milk, active starter, and oil to the bowl of a stand mixer or a large mixing bowl if kneading by hand. Whisk to combine.250 grams whole milk, 100 grams active sourdough starter, 20 grams olive oil
- Add flour, sugar, and salt to the bowl. Stir until a soft, shaggy dough forms.400 grams all-purpose flour, 30 grams granulated sugar, 12 grams fine sea salt
- Let the dough rest, covered with a tea towel, for 20 minutes. Once the dough has rested, knead for 12 to 15 minutes with the stand mixer fitted with the dough hook attachment or by hand. The dough will be soft and elastic when ready. Form it into a ball and, if kneaded by hand, place it back into the mixing bowl.
- Cover the bowl well with a tea towel and plate, then leave it at room temperature to rise for about 8 hours, or until doubled in size. Look for size, not at the clock. The dough must double during the bulk ferment.
Day Two: Shape and Second Rise
- Grease the bread tin with butter and set aside.Butter, for greasing
- Once the dough has gone through the first proof and doubled in size, it's ready to be shaped. Lightly flour a clean surface with flour and tip the dough out onto it.
- Pat the dough into a rectangle with the long edge the same length as the bread tin.
- Roll the dough into a tight spiral, making sure you're rolling from the long edge, then place it seam-side down into your prepared tin.
- Cover the dough with a damp tea towel and set in a warm, draft-free place to rise again for 2 to 4 hours, or until the dough is about 1cm (⅓ in.) below the edge of the baking tin.
Day Two: Bake
- Once your loaf has risen, it's ready to be baked. Preheat the oven to 400°F (200°C) and set the rack in the centre of the oven.
- Place the bread onto the centre rack and bake for 30 to 40 minutes, or until the top of the loaf is golden and the interior temperature reaches 200°F (90°C). If the top is browning too much, cover loosely with foil.
- Remove from oven and cool in the tin for 10 minutes before carefully removing and cooling fully on a wire rack. If you use a glass or ceramic dish, the loaf might need to cool for a longer time before it releases from the container.
- Don't cut the bread until it's completely cool, at least a couple of hours. It keeps well in a container or wrapped in beeswax wrap for a couple of days and can be frozen for up to a month.
Notes
Nutrition
Nutrition information is an estimate and is provided as a courtesy. For precise nutritional data, please calculate it independently using your preferred nutrition calculator.
This post may contain affiliate links. If you purchase through these links, we may earn a small commission, at no additional cost to you.
 Did you make this recipe?Please consider leaving us a rating and a comment. It helps others find our work, which genuinely supports what we do. Thank you!
This recipe is easy, and the loaf is perfect for sandwiches!! Such a great recipe!
This is the only sandwich bread that I have made that my daughter likes more than store-bought bread - a rare compliment from her. Thank you for sharing the recipe!