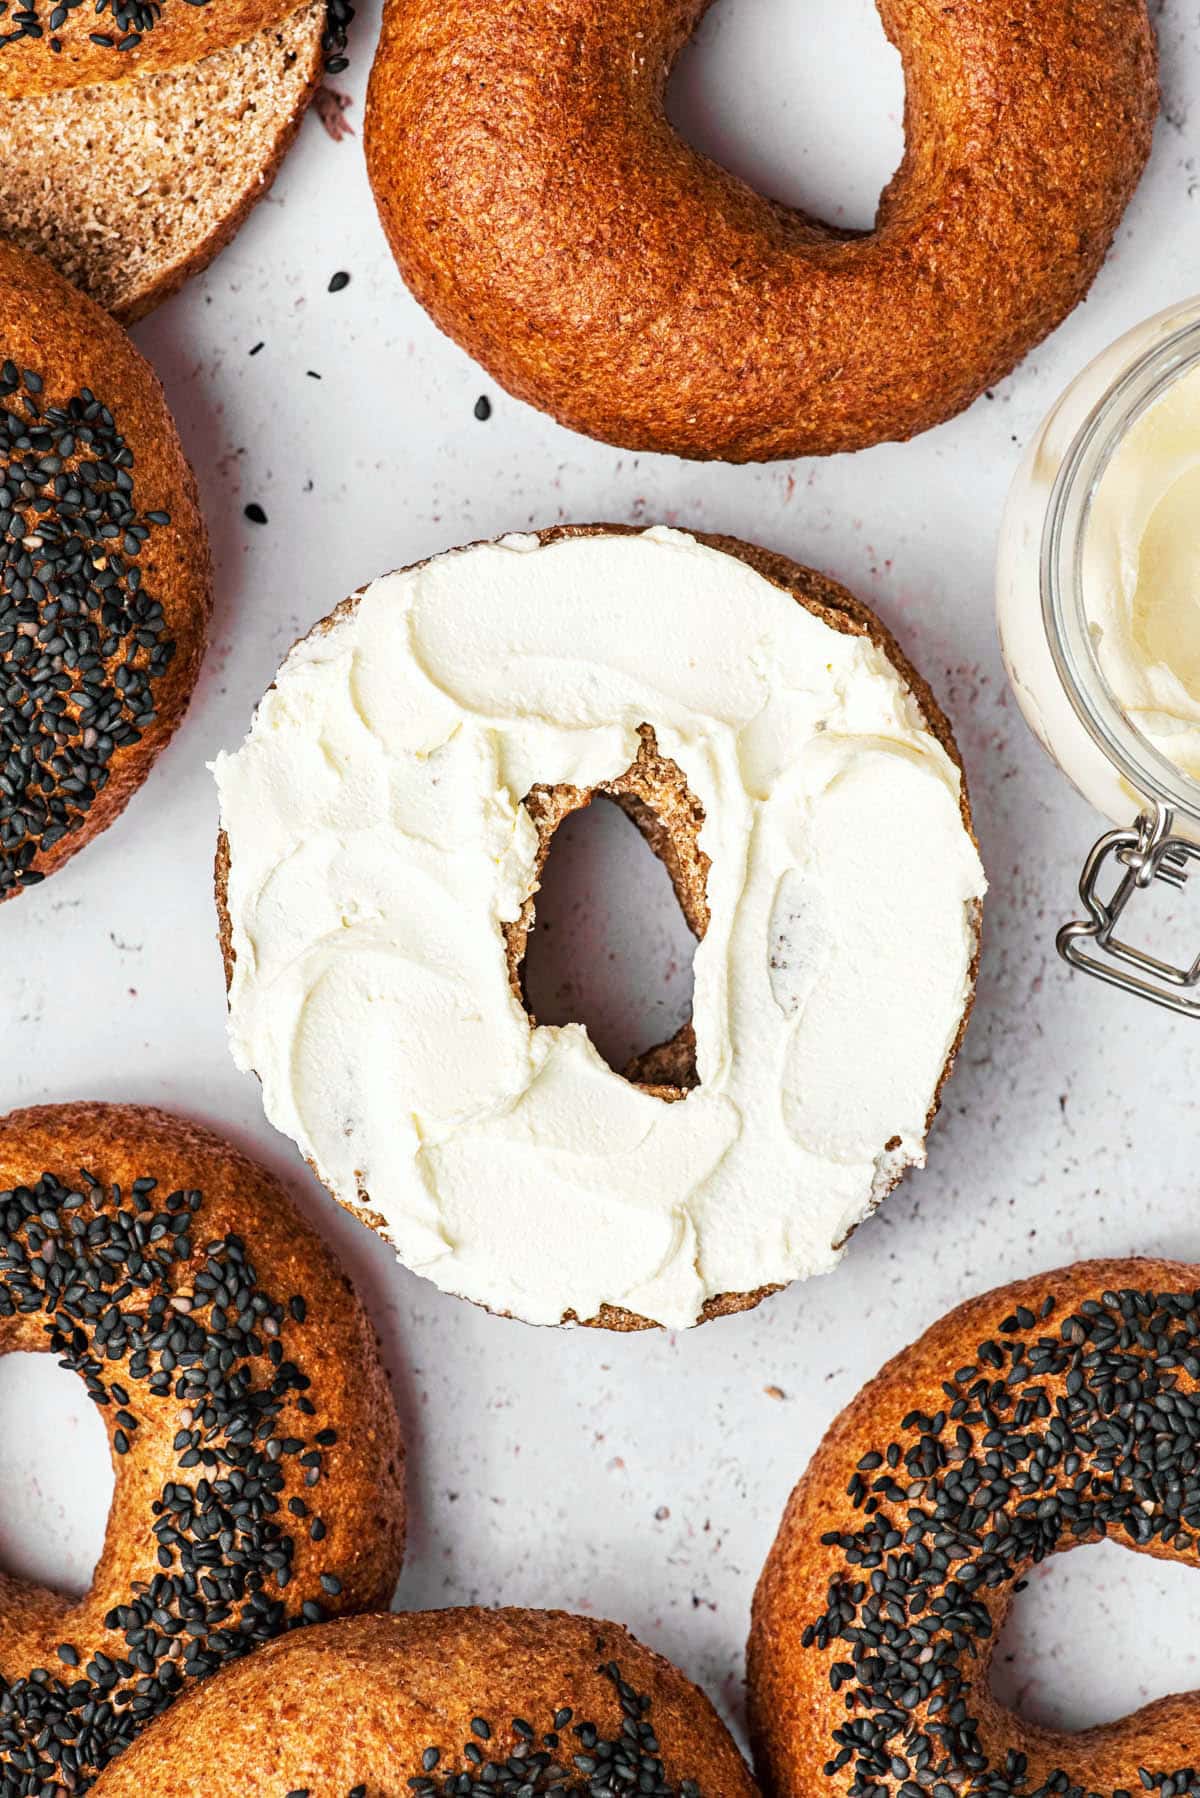
There's no better breakfast than a good bagel with cream cheese, and these 100% whole wheat sourdough bagels are a healthier version of the classic. Even with plain flour, sourdough always has a superior flavour. With nutty whole wheat flour, though, you get the best of both worlds.
You need some time, as with all sourdough recipes, but the active work needed isn't very much. That being said, they do need kneading, and we recommend doing it by hand - it's a low hydration dough. Love to use whole grains in sourdough? Try our whole wheat sourdough bread and sprouted grain sourdough, too.
One reader, Angeli, commented: "These came out incredibly!! The dough was much easier to handle after proofing than other sourdough bagel recipes I’ve tried using bread flour (too sticky!). These bagels were perfectly round, puffed, and golden brown. They taste so good of sourdough!!! Thank you so much!!!"
Another reader, Annette, said: "I make these all the time. My family loves them. Thank you for such a great recipe using whole grains!"
Jump to:
Ingredients

Ingredient Notes and Substitutions
- Whole wheat flour: if you don't want to go all whole wheat, you can do half white and half whole wheat. Whole wheat bread flour can also be used.
- Sweetener: honey, molasses, and maple syrup can all be used interchangeably in this recipe, with slight changes in flavour. Use whichever you like the most. These are much easier to find than malt syrup, but it can be used if preferred.
- Starter: any type of active sourdough starter will work here. White flour, whole wheat, rye, etc. are all fine, as long as it's strong.
- Toppings: use whatever toppings you like. Sesame seeds, herbs and spices (everything bagel spice), za'atar, anything you like.
Use the JUMP TO RECIPE button at the top, or scroll to the bottom of the post to see the printable recipe card with full ingredient measurements and complete instructions.
Method
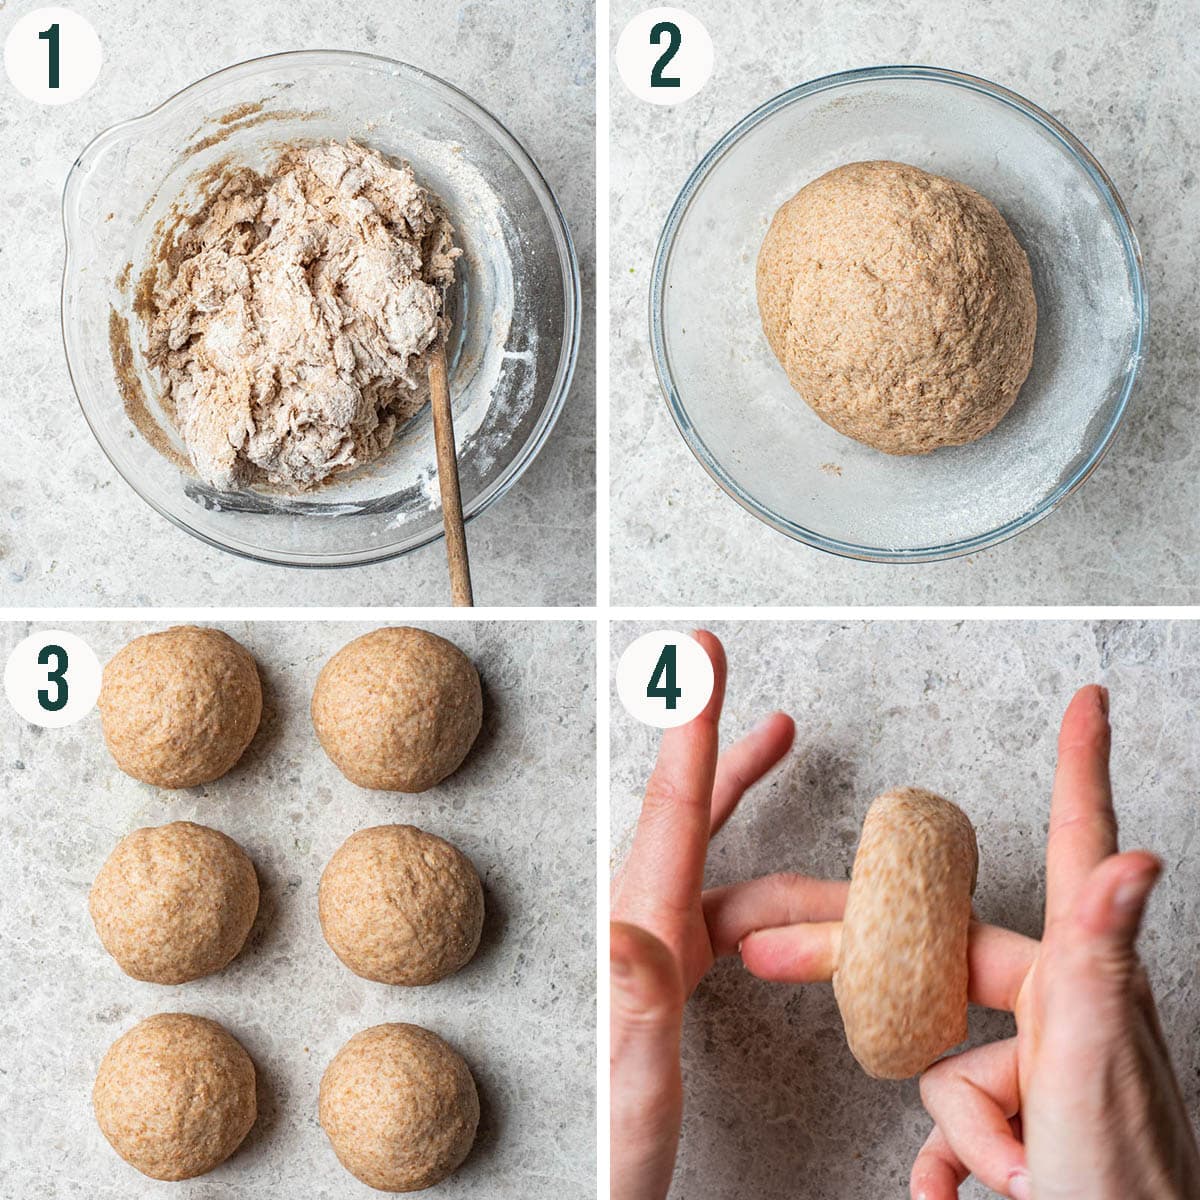
Step 1: mix the starter and water, then stir in the dry ingredients to form a shaggy dough.
Step 2: knead the dough by hand until soft and smooth.
Step 3: form ten equal balls of dough, rotating to get some surface tension.
Step 4: form holes in the balls with your fingers. Aim for the holes to be about half the width of the bagel.
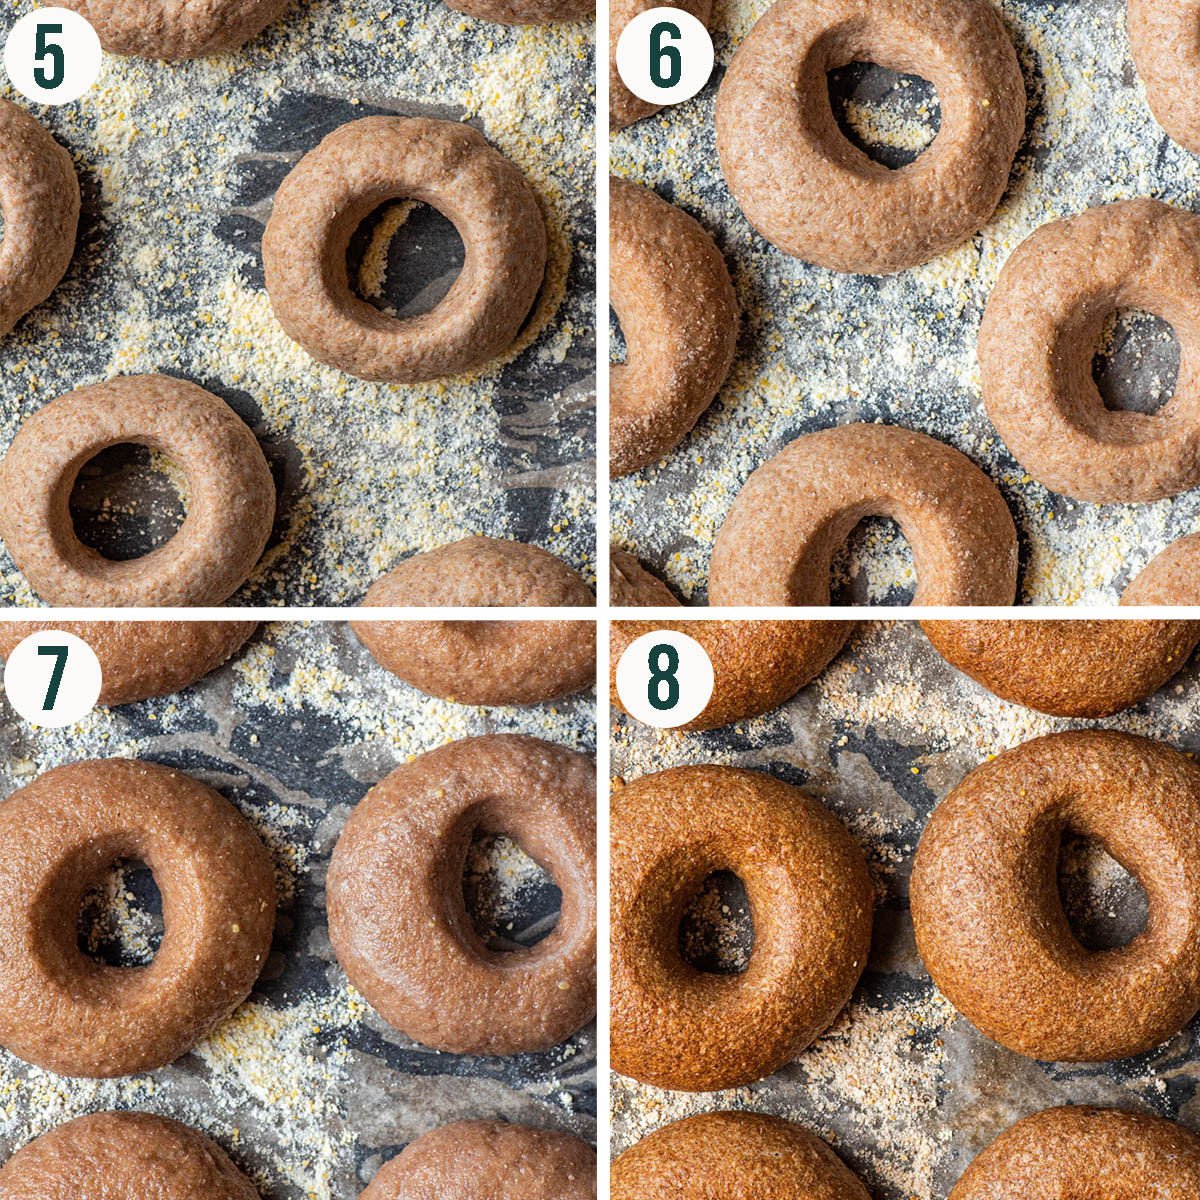
Step 5: set the bagels on a lined baking sheet to prove.
Step 6: they should almost double in size after a few hours.
Step 7: boil the bagels in simmering water, and they should increase in size again.
Step 8: bake until golden brown and cool before slicing.
Top Tips
- Make them less chewy: if you want softer bagels, boil them for about half the time. A slightly shorter boiling time is fine, but too long (for even chewier bagels) and you risk causing the bagels to rise less in the oven.
- Keep the water steady: make sure the water is at a constant simmer when boiling the bagels, and turn it up after adding them if needed to keep it consistent.
- Knead by hand: unless you have a professional grade standing mixer, you're better off kneading these by hand. A cheaper mixer might (probably will) burn out the motor.
Recipe Notes
Boiling is mandatory for bagels, and it's what creates that thin chewy outer layer. The boiling time is given as a range, so keep an eye on your bagels - you'll notice that they expand significantly in the hot water. Once they've stopped changing, you can take them out.
Baking soda is added to the water to make it more alkaline. It's a substitute for the more dangerous lye, and adds a nice dark, chewy exterior crust to the bagels. Just a small amount makes a big difference.
Honey, molasses, or maple syrup is added to the water for a touch of sweetness, and also to increase the chewiness of the bagels.
This is a slightly higher hydration dough than many white-flour sourdough bagels, because whole wheat flour absorbs more water (this is why hydration percentages can be so tricky for beginners!). It's deceptively soft if you're using to making other bagels, but don't be fooled - the whole grains will absorb that liquid as it rests.
The Float Test
The proving time will vary, and this is why the float test is so important. If your bagels float after two hours in a warm house, great, time to refrigerate.
If your starter is a bit sluggish, or your house is chilly, the bagels might need a lot longer to prove. In the winter, it might be all day before they're ready.
That being said, if your bagels don't pass the float test, and you're tired of waiting, you can try to refrigerate overnight as usual. They may rise a bit more in the fridge, and usually they turn out fine, if not perfect, if they didn't quite float.
You can see in the process images above how much the bagels rise in the first proving period at room temperature. They don't quite double, but it's close. This is sourdough - be patient!
Refrigerate Before Cooking
The shaped bagels, once proved, are a little difficult to handle, and tend to lose their shape. Refrigeration makes them easier to move into the boiling water without stretching the dough, and improves the overall sourdough bagel taste.
It is possible to skip the long ferment in the refrigerator, after the bagels have proved at room temperature. This chilling period is to improve flavour, not necessarily for the bagels to rise any further. If you don't care for that sourdough flavour, skip the refrigeration and go right to boiling.
FAQ
What do you eat with sourdough bagels?
You can eat all the same things with sourdough bagels as you would with any other bagels – classic cream cheese, smoked salmon, avocado, peanut butter, make pizza bagels, and more. The possibilities are endless.
Why are my sourdough bagels sinking?
If your sourdough bagels are sinking in the water and not rising right away, they're either under- or over-proved. This will cause them to sink during the boiling step and collapse when they're out of the water.
Why are my sourdough bagels tough?
If your bagels are tough, it may be either due to under-proving or that too much flour was added during the kneading process. This is especially true for whole wheat bagels, while don't need flour added, as the whole grains absorb more water.

If you make this Whole Grain Sourdough Bagel recipe or any other sourdough recipes on the Baked Collective, please take a moment to rate the recipe and leave a comment below. It’s such a help to others who want to try the recipe. For more baking, follow along on Instagram, TikTok, and YouTube.
100% Whole Wheat Sourdough Bagels
Equipment
- Mixing bowl
- Whisk
- Bread machine optional
- Tea towel
- Beeswax wrap optional
- Measuring cups and spoons or a digital kitchen scale
- baking sheet
- Large pot
- Wire rack
Ingredients
- 315 grams water
- 200 grams active starter
- 30 grams honey or maple syrup
- 650 grams whole wheat flour
- 10 grams sea salt
- Flour for proving
- Toppings, as desired
For Boiling
- 1 tablespoon baking soda
- 1 tablespoon honey or brown sugar
Instructions
Day One
- Add the water, starter, and honey or maple syrup to a large bowl (or the bowl of your standing mixer) and whisk until well combined.
- Add in the flour and salt, and stir until a shaggy dough forms. Turn the dough out onto a work surface and knead until smooth and pliable, about 10 minutes. Alternatively, transition to a dough hook and knead by machine.
- Shape the dough into a ball and return to the bowl. Cover the bowl with a towel and set aside to rest for 20 minutes.
- Once the dough has rested, take it out of the bowl and weigh it. The total weight should be about 1100 grams.
- Divide the dough into 10 equal pieces, weighing each piece to ensure accuracy.
- Shape each piece into a small ball by tucking the corners underneath, cupping the dough, and rolling it in a circular fashion on a clean, flour-free work surface. This helps to create surface tension and a skin on the ball.
- Cover dough balls and rest another 15 minutes. Line a baking sheet with parchment paper and sprinkle generously with flour or semolina. Note, if your baking sheets are small, you may need two.
- To shape the bagels: poke a hole with your finger directly through the centre of the dough ball. Insert both index fingers into the hole and roll fingers around each other to stretch out the centre (like a barrel roll) until it’s about the size of a walnut. Place on the lined baking sheet and repeat with the rest of the bagels.
- Cover the shaped bagels with a damp tea towel and let them prove at room temperature for 2.5-4.5 hours, or until puffy and about doubled in size. This could take more time, depending on the temperature in your house.
- Take a test bagel and place it in a dish full of cold water. If it floats, they’re done proving. Dry the test bagel off and return to the baking sheet. If it sinks, it still needs to prove longer.
- Once proved, cover the pan(s) with a damp tea towel, or beeswax wrap and refrigerate for 12-24 hours, or overnight.
Day Two
- Preheat the oven to 400°F (200°C). Place any toppings on flat plates, so they're ready to go.
- Bring a large pot of water to a rolling boil and add the baking soda and honey or brown sugar.
- Remove the bagels from the fridge and gently place them, 2-3 at a time, into the water. Boil for 20-30 seconds on each side.
- Remove boiled bagels with a slotted spoon to get rid of most of the water.
- Shake off excess water and immediately dip the top of the bagel into desired toppings. Set it back on the baking sheet. Repeat this process with the remaining bagels.
- Place the baking sheet into the centre of the oven.
- Bake for 18-22 minutes or until golden on top. Cool fully on a wire rack before slicing and serving or storing. Excess bagels freeze well - we recommend slicing them before freezing for easy toasting.
Nutrition
Nutrition information is an estimate and is provided as a courtesy. For precise nutritional data, please calculate it independently using your preferred nutrition calculator.
This post may contain affiliate links. If you purchase through these links, we may earn a small commission, at no additional cost to you.
 Did you make this recipe?Please consider leaving us a rating and a comment. It helps others find our work, which genuinely supports what we do. Thank you!
Hello, once the bagels do the final proof can you skip the refrigeration and boil/bake?
Hi Aida, it is possible to skip the long ferment in the refrigerator, after the bagels have proved at room temperature. This chilling period is to improve flavour, not necessarily for the bagels to rise any further. If you don't care for that sourdough flavour, skip the refrigeration and go right to boiling.
I am happy with the results. I can not judge the recipe because it is the first that I have tried. One thing is that the bagel did not float on the top of the water initially because the refridgeration made them more dense. All in all I think it is a winner!
I am a sourdough bread baker using only 100% whole grain flours so I decided to give this recipe a whirl. Because I wasn’t sure whether the flour specified was whole grain whole wheat (unrefined) or regular whole wheat, I decided to increase the water for my very thirsty Canadian 100% whole grain whole wheat flour. I used 380g to the 650g of flour and the bagels came out absolutely beautiful after a 24 hour cold proof. This recipe is a keeper and one I will try using a variety of seeds inside as well as on top! Yum.
Your recipe calls for whole wheat flour, however, doesn’t specify whether it is 100% whole grain whole wheat flour. Please advise. I normally make only 100% whole grain sourdough so use 400g water to 500g whole grain whole wheat flour. For that reason, the quantity of water to flour sounds very low for the amount of flour being used if it is 100% whole grain as opposed to simply whole wheat flour (refined). I would love to try your recipe and would be most appreciative if you would clarify the specifics on the flour so that I know whether I need to increase the water for my 100% whole grain whole wheat flour. Thanks so much.
Hi Tracy, I'm sorry, I don't really understand the question. When we refer to whole wheat flour, that is 100% whole grain whole wheat flour. I'm not sure what refined whole wheat flour would be other than refined or white flour (I tried looking it up and didn't find any information). I can assure you, though, that these bagels are made with whole grain flour - I usually use flour that I mill in my home mill - and the low hydration level is typical for bagels. I hope this can be helpful and that you like the bagels!
Hi! I am so excited to try this! If I wanted to make these cinnamon raisin, would I just add those into the mix the night before?
Hi Natalie, exactly, you can knead them in. We recommend soaking the raisins in hot water for 30 minutes before adding to the dough to make sure they don't suck up too much moisture from the bagels.
Haven’t baked just yet but I wanted to leave a comment, the only thing I didn’t appreciate was the 2 sets of instructions, one being before the ingredients and the one included with the ingredients, I started by following the first set and got to the point of shaping my bagels and found the second set realizing I didn’t add the honey at the start and missed a bunch of rest points, they seem okay but I’ll have to see after the bake is done, recipe seems super easy to follow other then that and I am excited to see how these turn out or to do it again soon!
Wonderful bagels! Very clear recipe. Realized that just buttering the pan worked great. No need for parchment paper that has silicone in it!
Thanks for the insight, Joanna! We use compostable silicone-free parchment paper but great to know that you can grease the pan if you can't access that type of paper.
Nice! Do you have a link to the compostable, silicone-free parchment paper you use? Been trying to find some for making pizza! Thank you!
Hi Joanna, the Baar paper should be available in North America, I think that's what Sophie uses. I'm not sure what brand I use - it's unbranded from a waste-free store. Apparently the If You Care brand is fully compostable, but they still use silicon, so it's probably greenwashing. You do need to grease the fully compostable paper.
Thank you so much for your response!
I make these all the time. My family loves them. Thank you for such a great recipe using whole grains!
Hi, is the baking soda in the boiling water due to these being 100% whole wheat? Or could we omit that and use barley malt syrup?
Hi there, the baking soda is to replicate lye in traditional bagels, and it makes them chewier. You can omit but the texture will be different.
Hi! I make your sourdough ny style bagels and my family loves them!! However, the recipe isn’t showing up anymore! I know the general gist I just need the measurements in grams if you could post. My whole family would be very grateful. Thank you so much!
Hi Elizabeth, those bagels are over on the old site, which looks like it's down now. You can use this recipe but add an extra 50g flour (and use all strong bread flour). We are planning on sharing another NY style bagel recipe here in the near future but in the meantime this is one very similar 🙂
I totally came here to ask the same thing. I want to say the old recipe was for 750 grams of AP flour, 10 grams of fine sea salt, 30 grams of barley malt syrup, 315 grams of water, 200 grams of fed starter. 1 TBSP of baking soda and tablespoon of brown sugar in the water. I started doubling both of those.
We will be adding a white-flour sourdough bagel recipe to this site soon - the old Baked website is no longer functional due to a lack of updates, but we will be sharing a standard sourdough bagel and basic sourdough bread in the next month or two.
Hi Elizabeth, you can find the improved bagel recipe here.
I followed the recipe but think covering them with a damp towel (as instructed in recipe) when in fridge overnight caused the water from the towel to absorb into my bagels, making them too heavy to float in boiling water. They originally passed the float test in cold water before going into fridge overnight. Will try again but will cover with dry tea towel.
It's pretty common that the bagels will no longer float after being refrigerated - the float test is for before they go into the fridge, and generally speaking they'll sink when they first hit the simmering water to cook. If you cover your shaped bagels with a dry tea towel they will dry out.
These came out incredibly!! The dough was much easier to handle after proofing than other sourdough bagel recipes I’ve tried using bread flour (too sticky!). These bagels were perfectly round, puffed, and golden brown. They taste so good of sourdough!!! Thank you so much!!!
We're so happy you like the recipe, thanks Angeli!