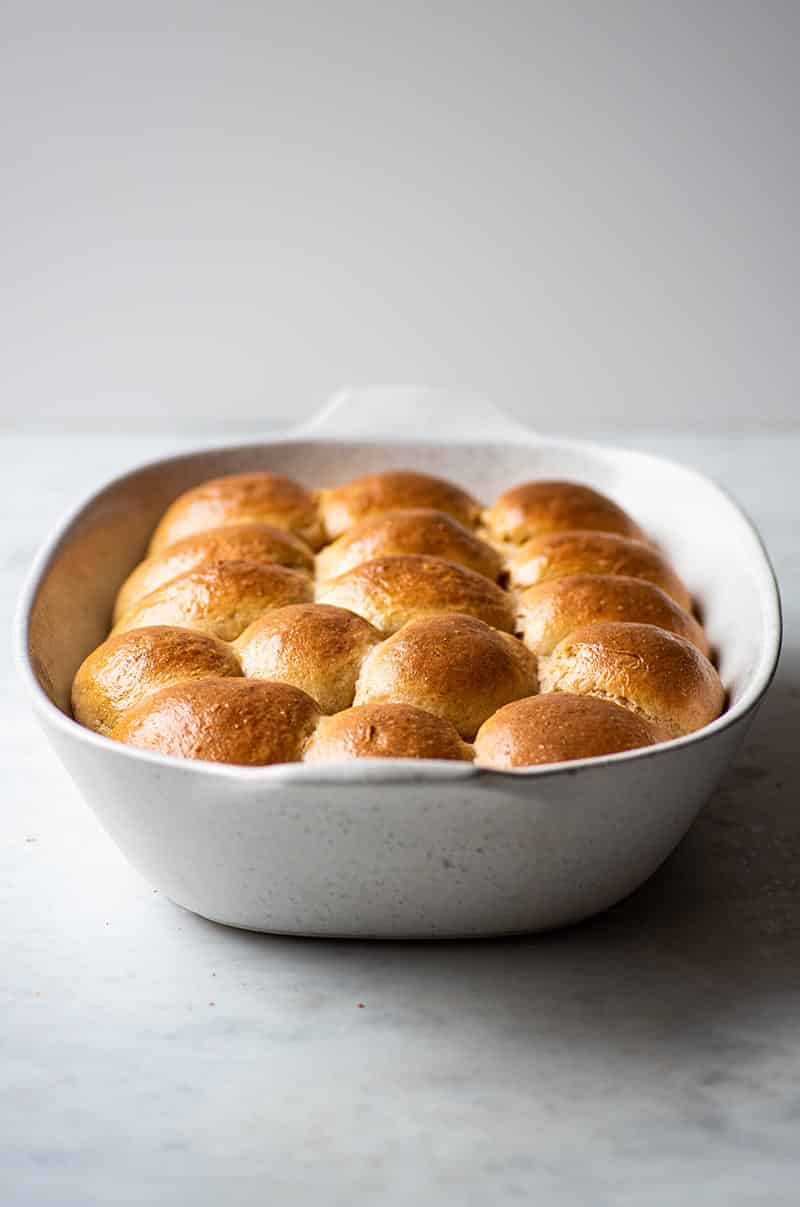
These pull apart no-knead sourdough dinner rolls are soft and fluffy with great flavour. The perfect side for any meal, served warm with butter. This recipe is a great alternative to traditional dinner rolls. With their golden crust, fluffy crumb, and great sourdough flavour, who wouldn't love one of these to accompany a hot soup or stew, or for the perfect bun-wich.
One reader, Shannon, commented: "These are so delicious and fluffy and perfectly soft. I love that this is a no knead recipe. They are really so simple to make. These are my new favorite sourdough dinner rolls."
Another reader, Emma, said: "This is such an amazing recipe! we love to bring these to holiday gatherings, and they also make the perfect breakfast sandwich bun and honestly are good just by themselves, so they’re great for anytime!! putting a plate over the tea toweled bowl does seem to make a difference during the rise, so be sure to follow that step. we pop it in the oven with the light on and that helps control the temp!"
Jump to:
Ingredients

- Bread flour: no bread flour, no problem. Simply use all plain flour instead. To make the rolls a bit more wholesome, use up to 40% whole wheat flour.
- Butter: you can use oil rather than butter in the buns, but it's not as nice. The texture is a bit denser and the crumb is tighter with oil. Margarine works well though. The butter must be soft before beginning.
- Starter: this should be active sourdough starter at its peak. It can be made with plain flour or any other gluten-containing flour like rye, whole wheat, etc.
- Sugar: honey can be subbed for sugar. Add it to the liquid ingredients rather than with the flour and salt.
- Make it dairy-free: if you prefer not to use butter for this recipe, simply use a 1:1 ratio of plant-based milk and vegan butter to make these dairy-free. We like Miyoko's and Naturli.
For some more delicious enriched sourdough baking, make our sourdough star bread, spring-ready sourdough hot cross buns, and sourdough cinnamon rolls.
Use the JUMP TO RECIPE button at the top, or scroll to the bottom of the post to see the printable recipe card with full ingredient measurements and complete instructions.
Method
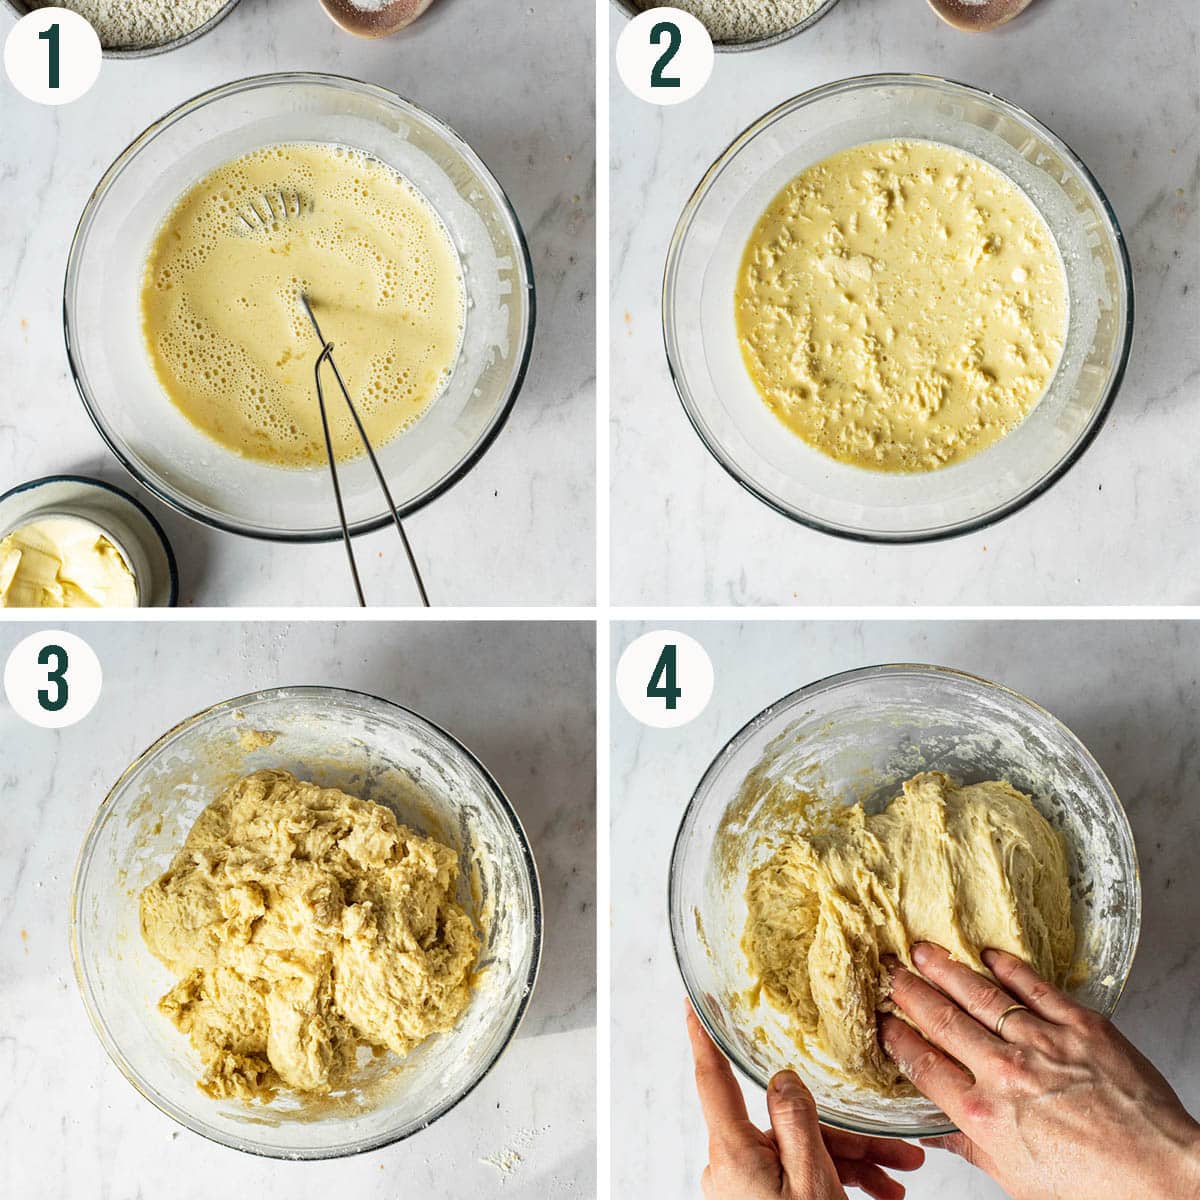
Step 1: mix the milk, starter, and eggs in a bowl.
Step 2: add the soft butter and whisk to bread it into small pieces.
Step 3: add the dry ingredients and mix into a shaggy dough.
Step 4: do the stretches and folds. The dough is stiff to begin with.
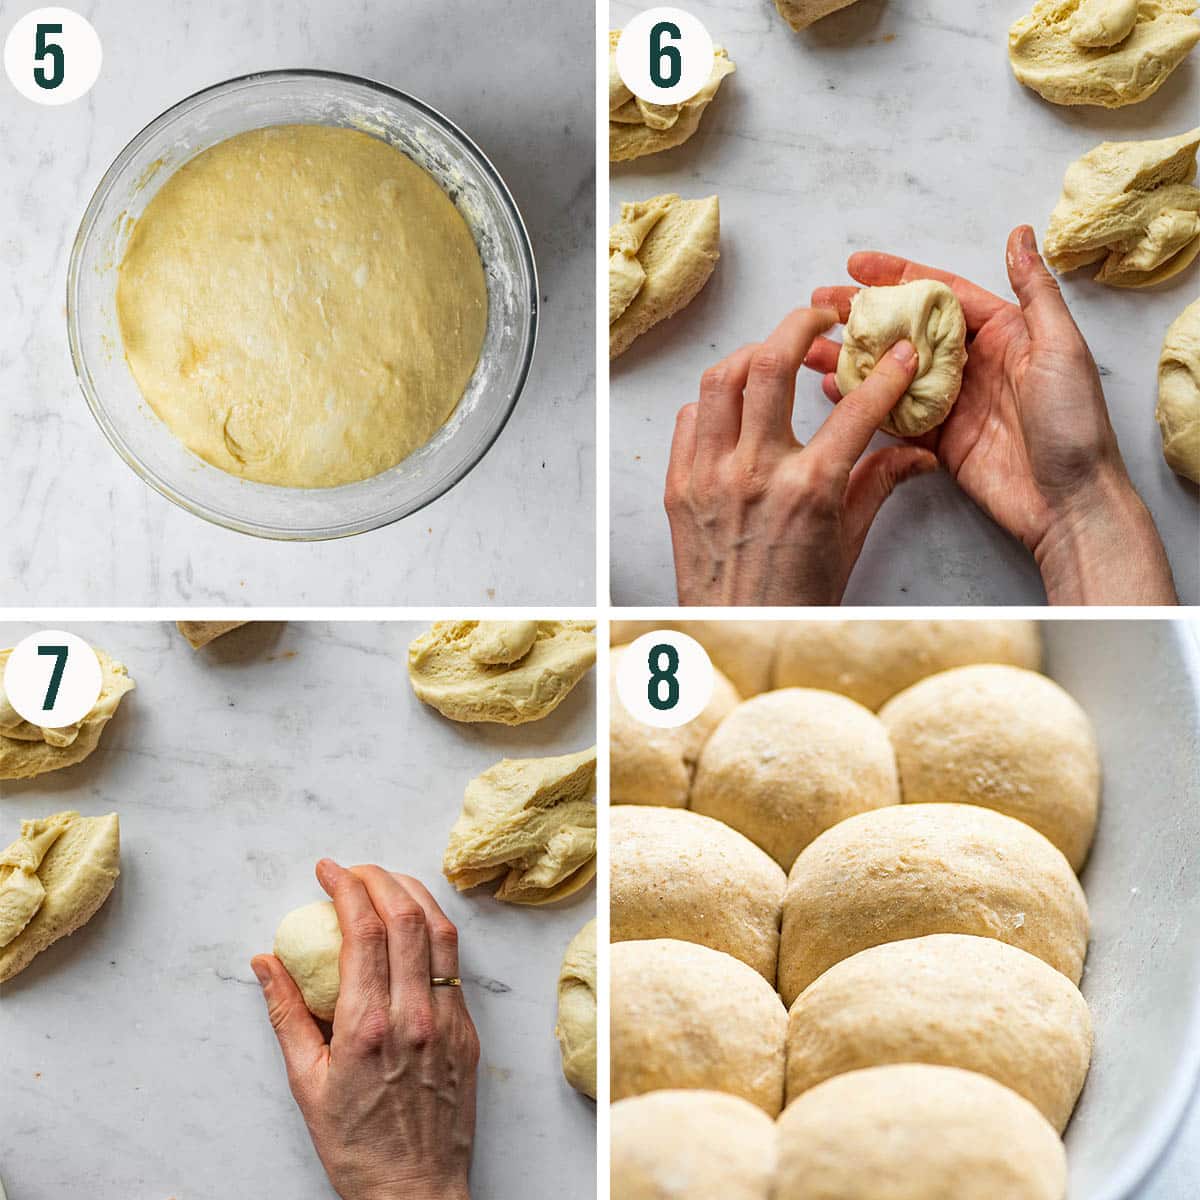
Step 5: let the dough rise until about doubled in size.
Step 6: shape equal portions of dough into balls.
Step 7: rotate the balls on a worktop to create surface tension.
Step 8: place the buns in a greased baking dish, rise until puffy, then bake.
Tips and Notes
No egg wash needed! You don't need an egg wash to get a beautiful golden crust on these rolls. And, we actually recommended not using one- it can prevent the rolls from rising fully during baking.
If you live in a very warm climate, the rising time will be reduced. Keep an eye on the dough and the buns after shaping, but you'll typically need only about half the time listed in the baker's schedule. Make the dough in the morning rather than evening so that you can see how it's doing (it can be refrigerated overnight before shaping).
Related: How to Make Sourdough Starter
We use a blend of bread flour and all-purpose flour. Bread flour contains slightly more gluten than all-purpose flour and will help in shaping your rolls and enhance their final texture. However, if you don't have bread flour, all-purpose will be just fine.
It is possible to refrigerate the dough for up to 24 hours after the bulk ferment (once the dough has doubled in size). Please note, though, that the shaped buns will need significantly longer to rise if the dough is fully chilled, up to 8 hours, due to the added butter, milk, and eggs.
If the terms used are unfamiliar, please see this post on how to stretch and fold sourdough.
How to Store
Storage: you can store any leftover rolls in an airtight container, bread bag, or tightly wrapped. If you have any leftovers that aren't at peak freshness, don't toss them out - cut them up and make sourdough croutons for soups or salads.
Freezing: freeze the rolls up to 3 months in an airtight container. Defrost them in the fridge and simply reheat before serving.
Room Temperature Ingredients
It is absolutely vital that all of the ingredients are at room temperature before starting. Any cold ingredients, including milk or eggs, will slow down the proving time so much that it will seem that the dough isn't rising at all.
Make sure to move any refrigerated ingredients to the counter to warm up before beginning. If you forget, you can heat the milk slightly (no warmer than skin temperature) and soften the butter in the microwave. Eggs can be warmed by placing them into a dish of warm water for 10 minutes.
Shaping the Rolls
When shaping the rolls, a good dusting of flour on a clean work surface is essential. We share photos above of how to fold and shape the dough before their final proof.
Basically, you need to lightly coat one side of each dough ball in a dusting of flour. Then, fold from the floured side in, stretching slightly, to bring the dough around and in to form a tight ball.
Next, turn each ball over onto a lightly floured surface and using both hands, rotate and pull the dough ball counterclockwise to create surface tension on the top of the ball. This will form a taut 'skin' on the outside of the dough which will help the rolls keep their shape during the final proofing and baking stages.
This is much easier if the dough has been chilled after doubling in size. You can skip that step but it's not recommended unless you're a sourdough expert.

Baker's Schedule
This recipe makes a great weekend bake, assuming you have two consecutive days off. If time is an issue, you have the option to leave the dough in the refrigerator for a longer bulk fermentation of up to 24 hours. Below, we break down the baking schedule for ease of reference:
DAY ONE
8:00PM: Mix the dough. Over the next hour, stretch and fold the dough several times, with 20 minutes between each round. A minimum of three stretch and folds is needed to help develop the gluten.
9:00PM: Cover well and set aside at room temperature (about 20°C or 68°F) to rise until doubled, or about eight hours.
DAY TWO
7:00AM (or when you get up): refrigerate the dough, still well covered, to chill it before shaping. This is semi-optional but recommended. Chill for a maximum of two hours.
9:00AM: Separate the dough into balls and form the individual rolls (see images and notes above for a visual reference). Place the rolls into the baking dish and cover with a slightly damp tea towel. Allow the rolls to rise at room temperature.
12:00PM: The rolls should be about doubled in size and ready to bake. After baking, brush with additional butter while still hot, and serve.
FAQ
How is sourdough different to regular bread?
Sourdough doesn't use commercial yeast, and rises due to wild yeasts collected from the air in a starter or levain. It has a stronger, slightly sour flavour when compared to standard yeast bread.
Are sourdough buns good?
Sourdough buns are not only super tasty, with a more complex flavour than yeast buns, but they can also be easier to digest for some people due to the long fermentation period.
What are sourdough buns made of?
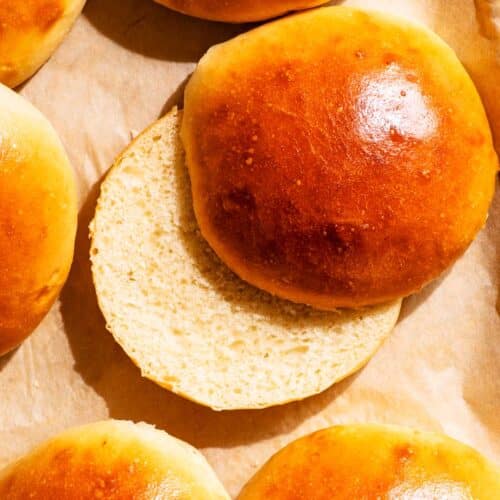
They can be as simple as flour, water, and salt, but most sourdough buns are enriched. That means they'll include extra ingredients like milk, eggs, and butter or another fat to make them more tender and light.

If you make this Sourdough Bun recipe or any other sourdough bread recipes on the Baked Collective, please take a moment to rate the recipe and leave a comment below. It’s such a help to others who want to try the recipe. For more baking, follow along on Instagram, TikTok, and YouTube.
Sourdough Dinner Rolls
Equipment
- Measuring cups and spoons or a digital kitchen scale
- Wooden spoon or spatula
- Mixing bowl
- Whisk
- Tea towel
- Plate
- Baking dish
Ingredients
- 180 grams whole milk, room temperature
- 200 grams active sourdough starter
- 2 large eggs, room temperature
- 375 grams bread flour
- 150 grams all-purpose white flour
- 50 grams sugar
- 12 grams fine sea salt
- 75 grams softened butter, plus more for brushing
Instructions
Day One: Making the Dough
- Add the milk to a large bowl. Add the starter and whisk to combine, then whisk in the eggs until well mixed. Place the butter into the bowl and stir to combine. The butter will be in small pieces.
- Add the bread flour and all purpose flour, sugar, and salt to the bowl. Use a wooden spoon or spatula to mix, making sure to incorporate all of the flour, until a shaggy dough has formed.
- Cover the dough with a tea towel, and, every 20 minutes for the next hour, do three rounds of stretches and folds.
Day One: Bulk Fermentation
- Place a lightly damp tea towel and a large plate over your bowl, then set aside to rise at room temperature overnight or for about 8 hours. The dough should double in size during this time.
- If your home temperature is quite warm, this will likely take less than 8 hours. See notes below.
Day Two: Shaping the Rolls
- Refrigerate the risen dough for at least 2 hours before shaping if possible. The cold dough is much easier to shape.
- Lightly flour a clean surface and turn the proofed dough out onto it.
- Separate the dough into 16 equal pieces.
- Grease a large baking dish with butter and set aside.
- Take each piece of dough and repeat the stretching and folding motion from earlier.
- Lightly coat one side of the piece in flour, then gently stretch one edge and fold it in to the middle of the piece. Rotate, repeating the motion, until a ball has formed.
- Place the ball onto a clean surface and use your hand to rotate the ball counterclockwise. This will help the roll to form a skin on the outer layer so that it keeps a nice shape when rising and baking.
- Repeat this until all of the rolls are shaped, placing each roll into the baking dish as you go.
Day Two: Second Proof
- Cover the rolls with a tea towel and set them aside to rise at room temperature for 2-3 hours, or until almost doubled in size. If you want to extend the fermentation time even longer, you could refrigerate the shaped rolls overnight again.
- If refrigerating, the buns must prove at room temperature first. Refrigerate after they have risen. The cold buns can then be baked directly from the refrigerator.
Day Two: Baking
- Preheat the oven to 350°F (180°C), then place the rolls into the oven.
- Bake for 25-30 minutes, or until very golden brown.
- Remove from the oven and brush the tops with a generous amount of melted butter. This both softened the rolls and adds even more flavour.
- Cool for at least 10 minutes before serving. The rolls will keep well for a few days in a sealed container at room temperature and freeze well.
Nutrition
Nutrition information is an estimate and is provided as a courtesy. For precise nutritional data, please calculate it independently using your preferred nutrition calculator.
This post may contain affiliate links. If you purchase through these links, we may earn a small commission, at no additional cost to you.
 Did you make this recipe?Please consider leaving us a rating and a comment. It helps others find our work, which genuinely supports what we do. Thank you!
I just baked this recipe for the third time. Because of time restraints, this is the first time that I was able to bulk ferment on the counter and after shaping, in the refrigerator overnight. The rolls came out big and soft and they taste wonderful
These are so delicious and fluffy and perfectly soft. I love that this is a no knead recipe. They are really so simple to make. These are my new favorite sourdough dinner rolls.
this is such an amazing recipe! we love to bring these to holiday gatherings, and they also make the perfect breakfast sandwich bun and honestly are good just by themselves, so they’re great for anytime!! putting a plate over the tea toweled bowl does seem to make a difference during the rise, so be sure to follow that step. we pop it in the oven with the light on and that helps control the temp!
Thanks Emma, so glad you like the rolls!