A tutorial on how to shape sourdough bread, specifically for sourdough boules, or the round loaves most common with homemade sourdough. Along with doing some good stretches and folds, shaping sourdough bread is one of the most important basics to master for perfect loaves. It's a simple process, without the need for any special tools.
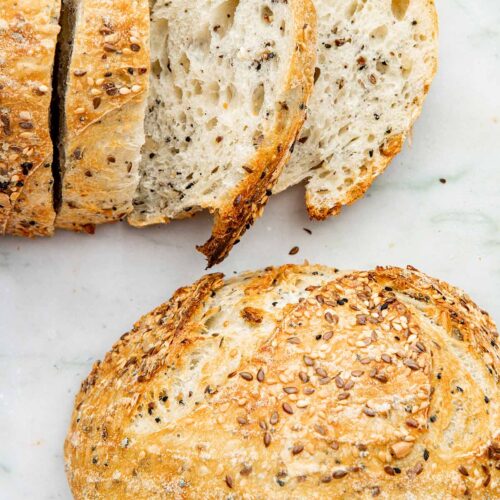
Shaping round loaves like this as outlined below creates surface tension, which helps to ensure a nice upward rise during baking (rather than the dreaded spread). It also makes for a good canvas for scoring.
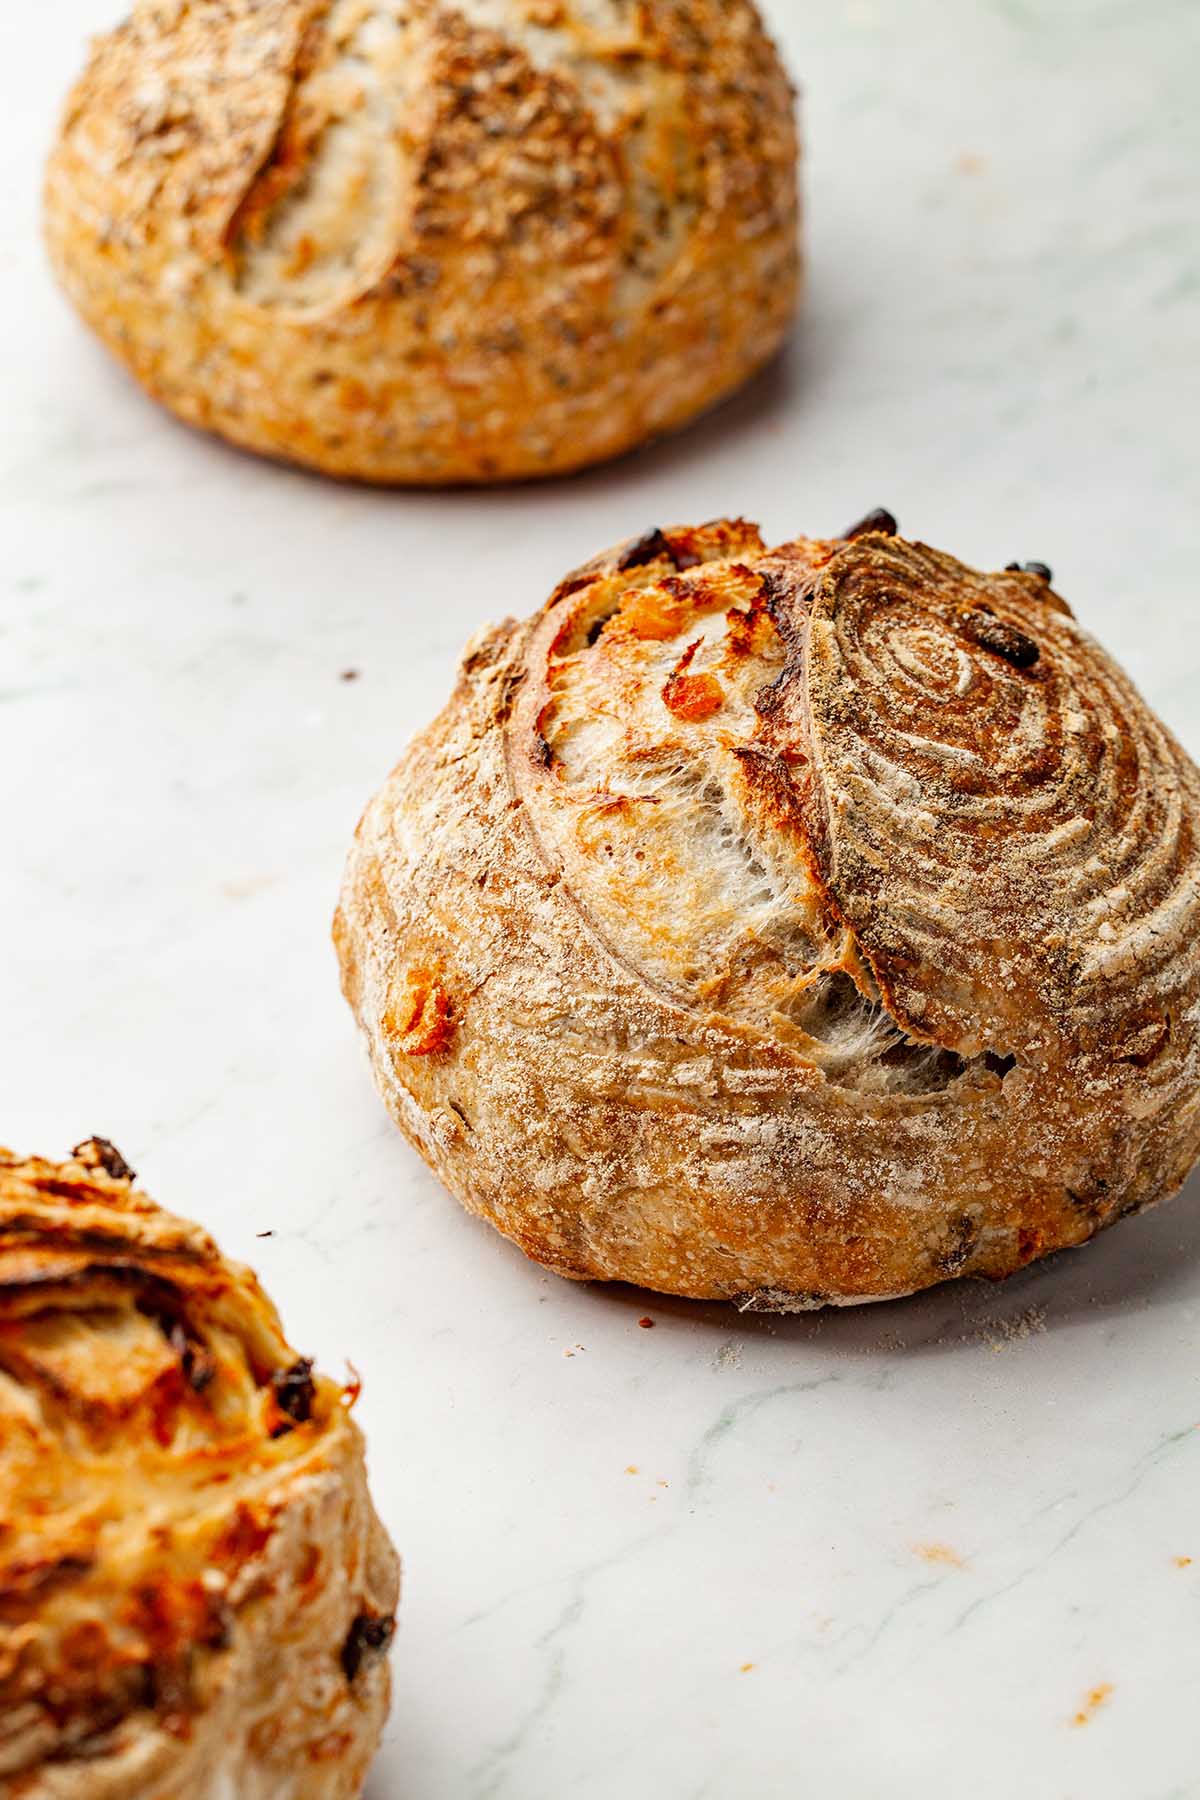
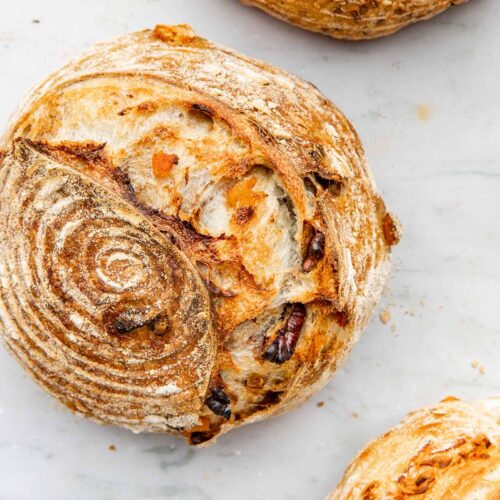
You can see in the image below that there's a clear outer layer on the loaf and how much it opened up during baking where it was scored. This won't happen unless you shape the loaf correctly. Keep reading for a picture tutorial on how to best shape sourdough boules.
This is a slightly more intensive style of shaping than is sometimes described, with rolling before turning. It's particularly helpful for beginners as the rolling of the dough helps to create some tension before the dough is turned.
How to Shape a Boule
After completing your stretches and folds, the recipe will either call for the bread to be shaped immediately, or to have a longer bulk ferment. Shape the loaf based on when the recipe states.
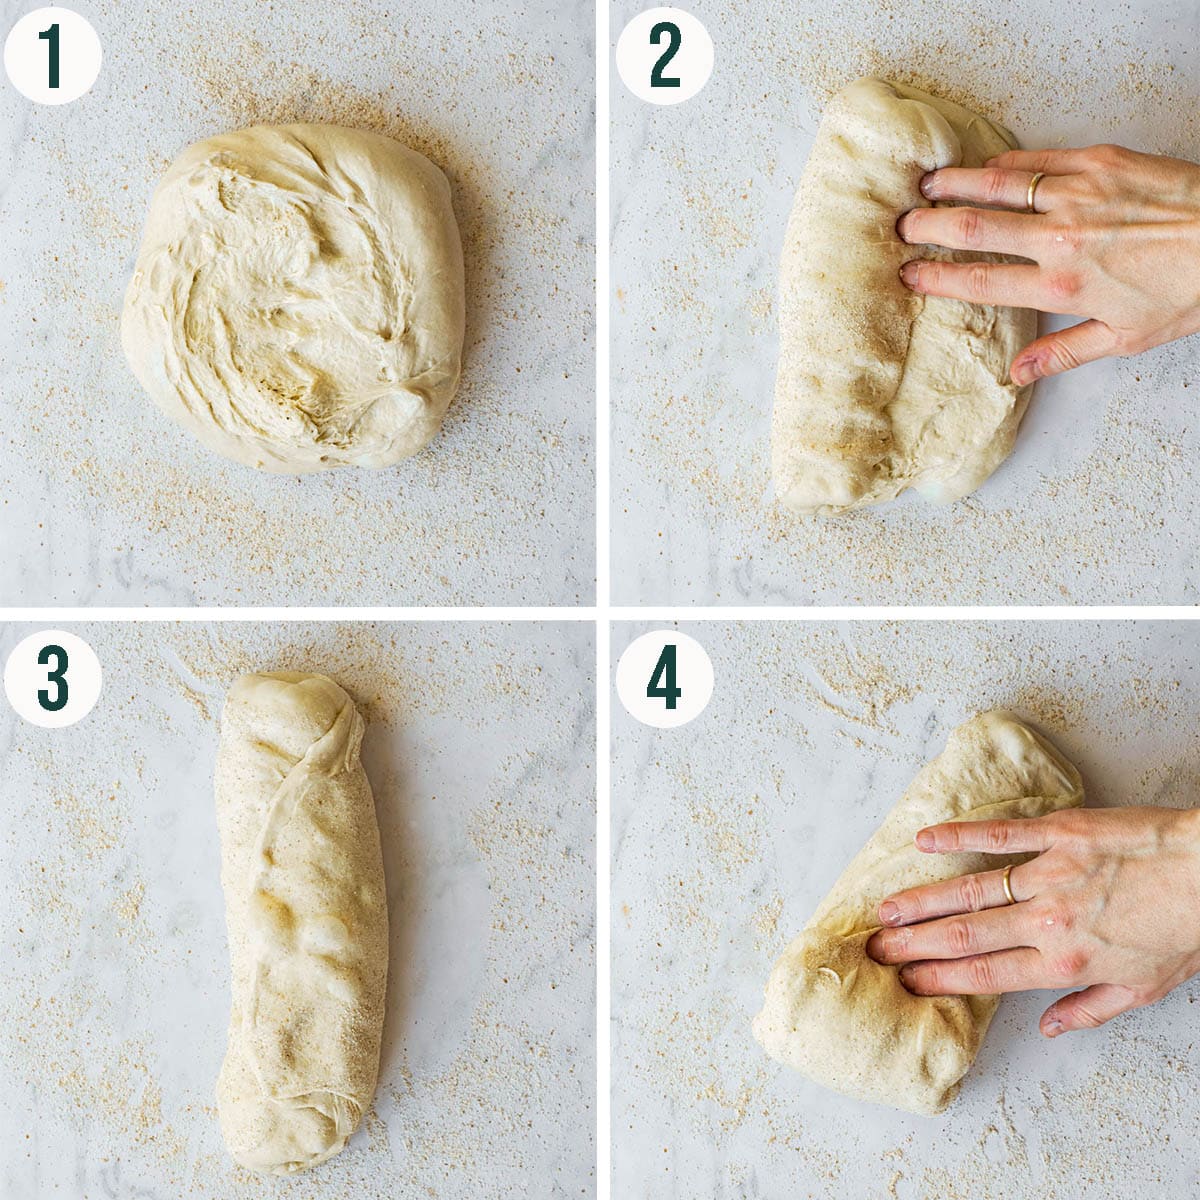
Step 1: lightly flour a clean working surface, then tip the dough out onto it. Lightly flour the dough, then gently press it into a rough rectangle.
Step 2: roll the dough toward yourself, creating a spiral, pressing lightly with each roll to make sure the dough is sticking to itself.
Step 3: change the direction so that the short end of the dough is facing you. Flatten slightly again, to about 3cm (1 in.) thick, for a long rectangle.
Step 4: roll the dough into a fat spiral again, rolling toward yourself and pressing the dough into itself with each turn over.
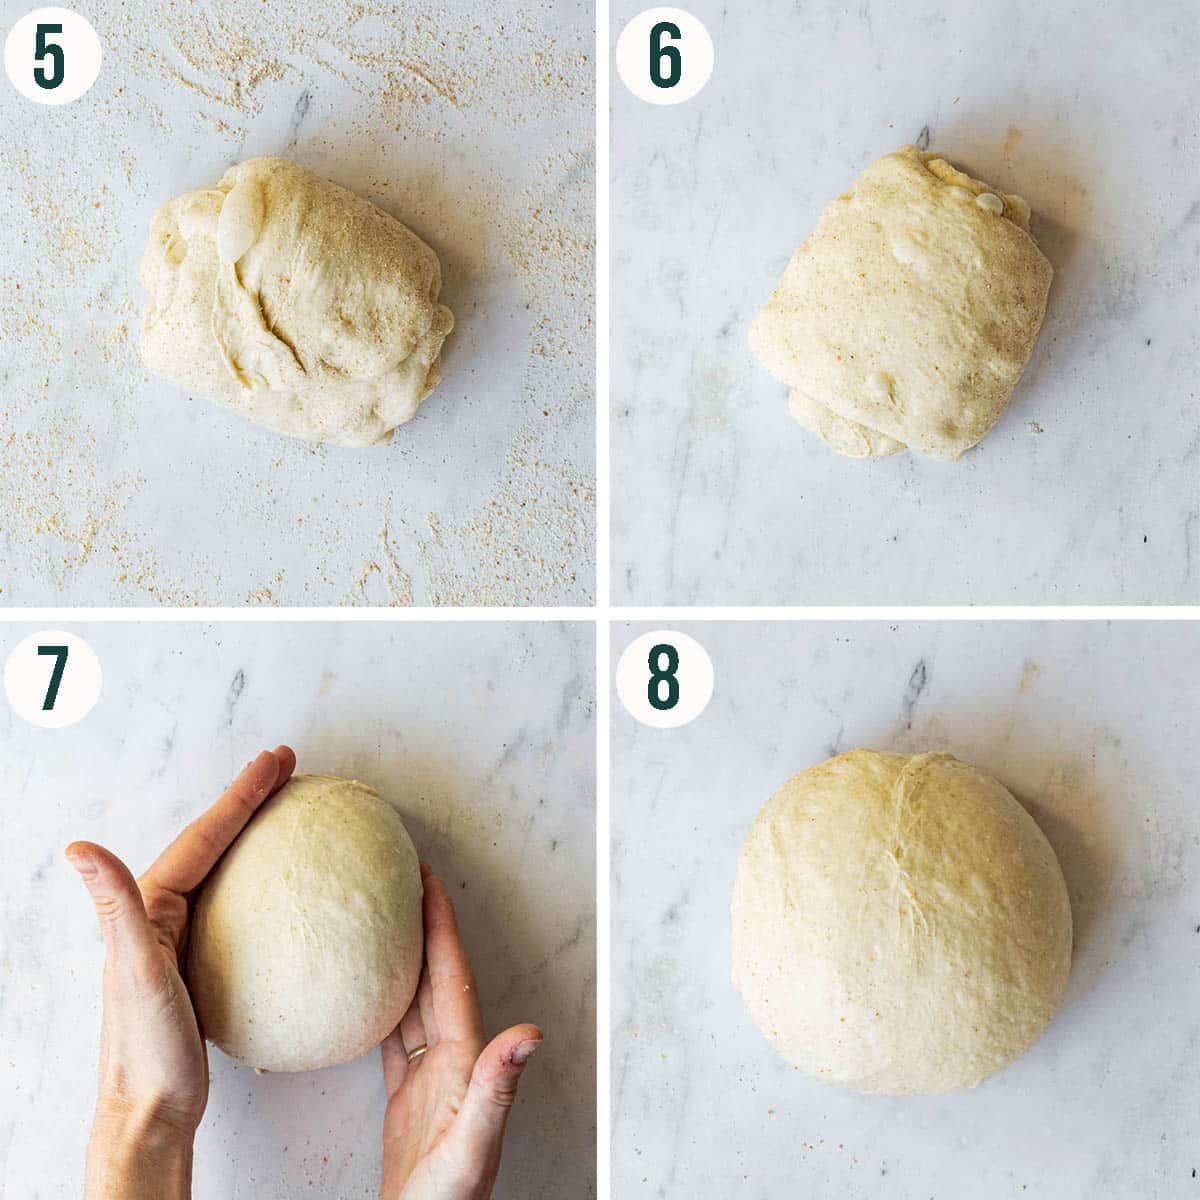
Step 5: the dough might form some bubbles here, that's okay! Brush any excess flour off your working surface (the bottom of the dough needs to stick to the surface slightly).
Step 6: flip the rolled up dough over onto the surface, with the spot where the dough joins at the end of the spiral facing down.
Step 7: flour the top of the dough lightly, then use your hands to turn it. Use the outer edges (pinky-side) of your hands to either turn the dough counter-clockwise or clockwise, depending on your dominant hand. Alternatively, you can gently cup the dough at its base and gently pull it toward you. Choose what feels most natural to you.
Step 8: the dough is ready when it holds its shape without spreading immediately, and has a visible skin, showing surface tension. You may see bubbles under the surface. Once you've reached this point, gently lift the dough with your hands or a bench scraper and place it seam-side-up into a floured banneton.
Top Tips
- If there's a tear: if your dough tears or loses tension while shaping, you'll have to start again from the beginning. It's just been taken a little too far.
- Refrigerate the dough: colder dough is easier to shape, especially for beginners. Same goes for lower hydration (a higher flour to water ratio) recipes.
- Use for non-boules, too: this method of shaping is very helpful for higher hydration doughs like sourdough pizza dough and sourdough focaccia too. Shape the dough into a boule like this to form surface tension before rolling out stretching it out.
Recipe Notes
Some breads, especially whole grain or gluten free recipes, will be a bit trickier to shape. If you see perfectly shaped loaves and scoring videos online, those are almost definitely made with industrial bread flour. Alternative flours (whole wheat, spelt, rye - any lower gluten flour) won't have the same kind of staying power.
Don't worry if your loaf isn't perfect the first time, or the first few times. It's a skill that takes a bit of practice, and the more you do it, the more successful you'll be.
Helpful Tools
While you don't need any tools for this, you might find some particularly useful. Not mandatory but can be nice!
- Dough scraper: helpful at times to rotate the dough, especially with high hydration loaves that may be a little sticky on the hands. It can also be used to lift the shaped loaf into the banneton (or other container).
- Banneton: typically used to proof the shaped loaf in, but as outlined in our sourdough tools post, a bowl lined with a tea towel will serve the same purpose.
- Lames: a lame or very sharp knife will be helpful when scoring after shaping and proving.
If you make found this Sourdough Bread Shaping Tutorial any other sourdough bread tutorials on the Baked Collective helpful, please take a moment to leave a comment below. It’s such a help to other readers. For more baking, follow along on Instagram, TikTok, and YouTube.