
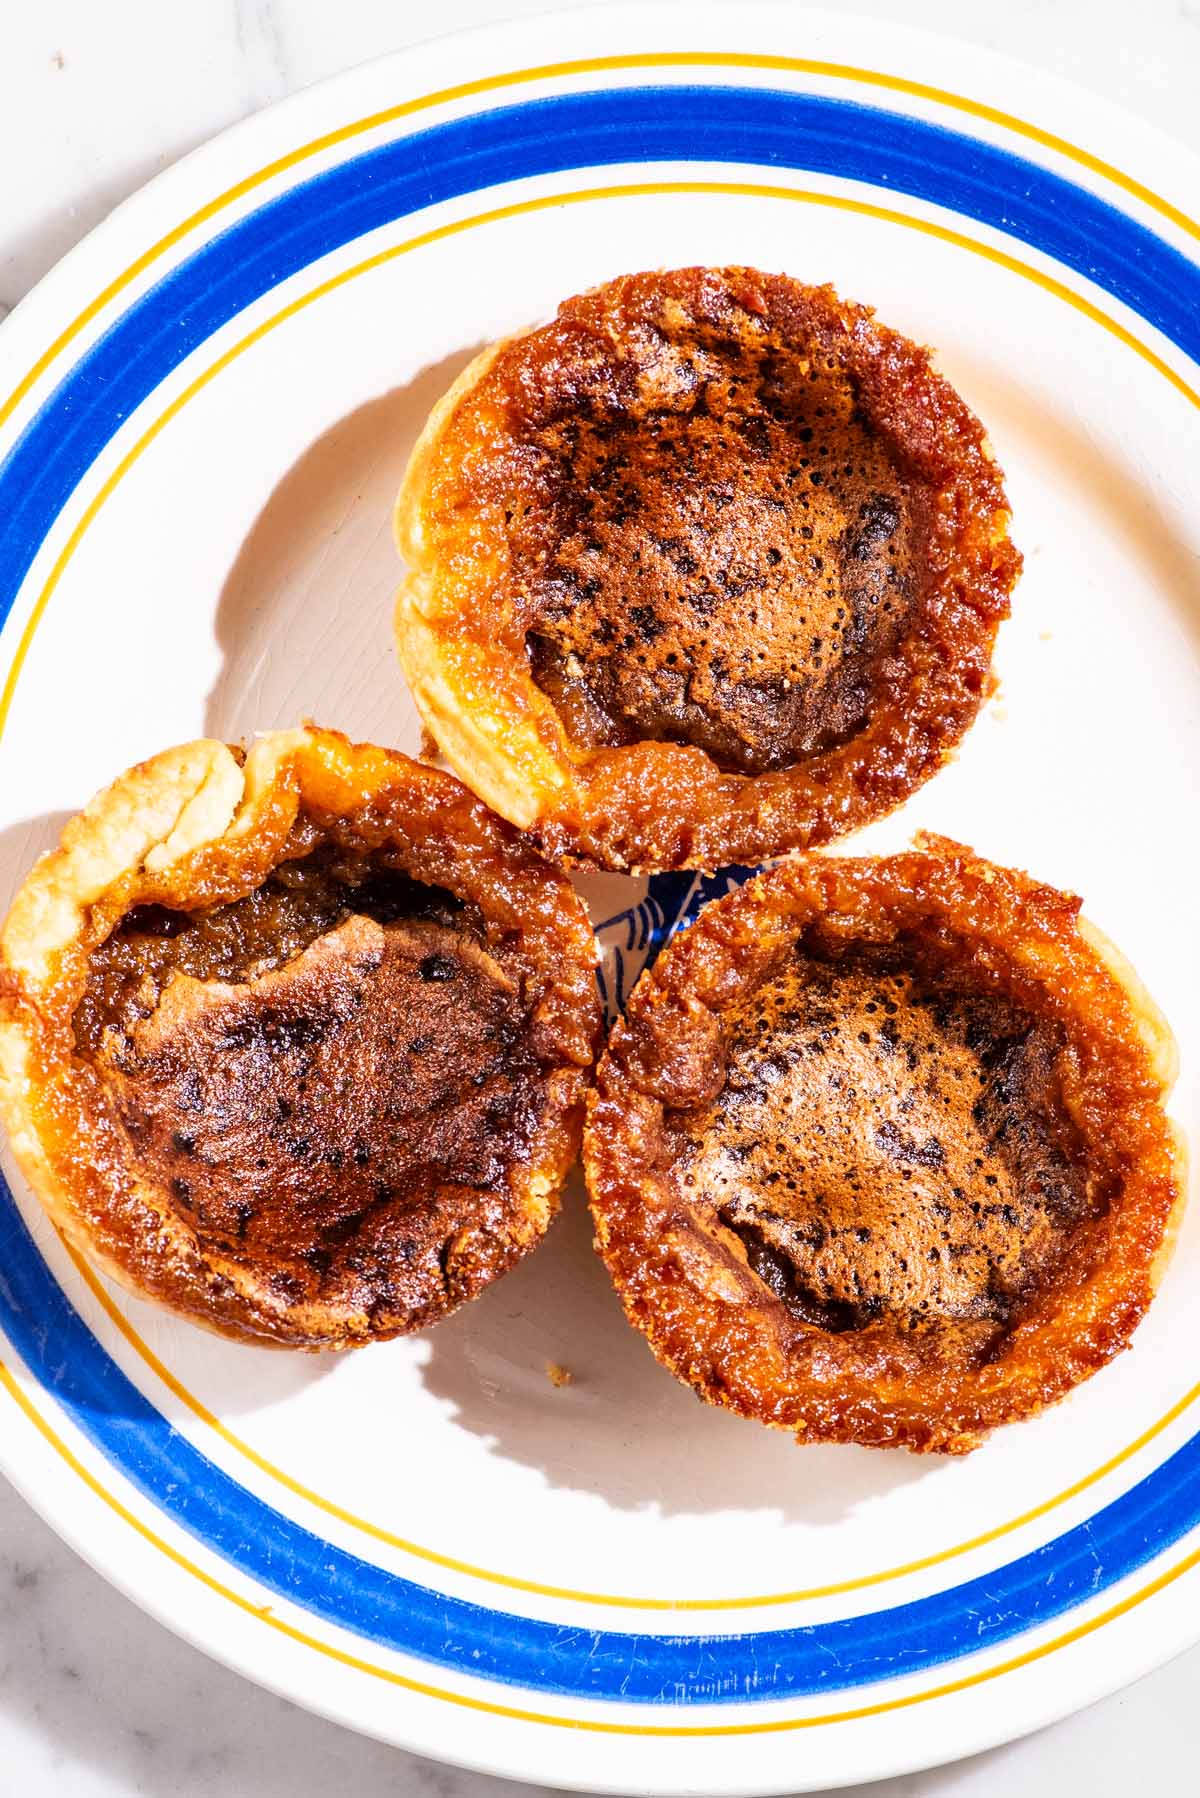
True Canadian butter tarts, a classic dessert popular across the country. These sweet, toffee-like pastries are a firm favourite for good reason. This recipe comes from Alex's grandmother-in-law, a fantastic baker, and are a real traditional version of the pastry (raisins optional).
This post may contain affiliate links. If you purchase through these links, we may earn a small commission, at no additional cost to you.
Recipe Rundown: Butter Tarts
Prep Time
20 minutes
Bake Time
35 minutes
Total Time
55 minutes
Servings
12 tarts
Difficulty
Intermediate
Calories
232 kcal*
Primary Ingredients
Brown sugar, pie dough, butter, vanilla, vinegar, and an egg.
*Calories are an estimation.
How This Recipe Works

Like Nanaimo bars and date squares, butter tarts are a Canadian staple and you'll find them at just about any event that warrants sweet treats (we call them dainties in Manitoba). If you've never had a butter tart you're in for a real treat - they're like toffee in tart form, with a crisp pastry shell and sweet, caramel filling made from brown sugar, butter, and vanilla.
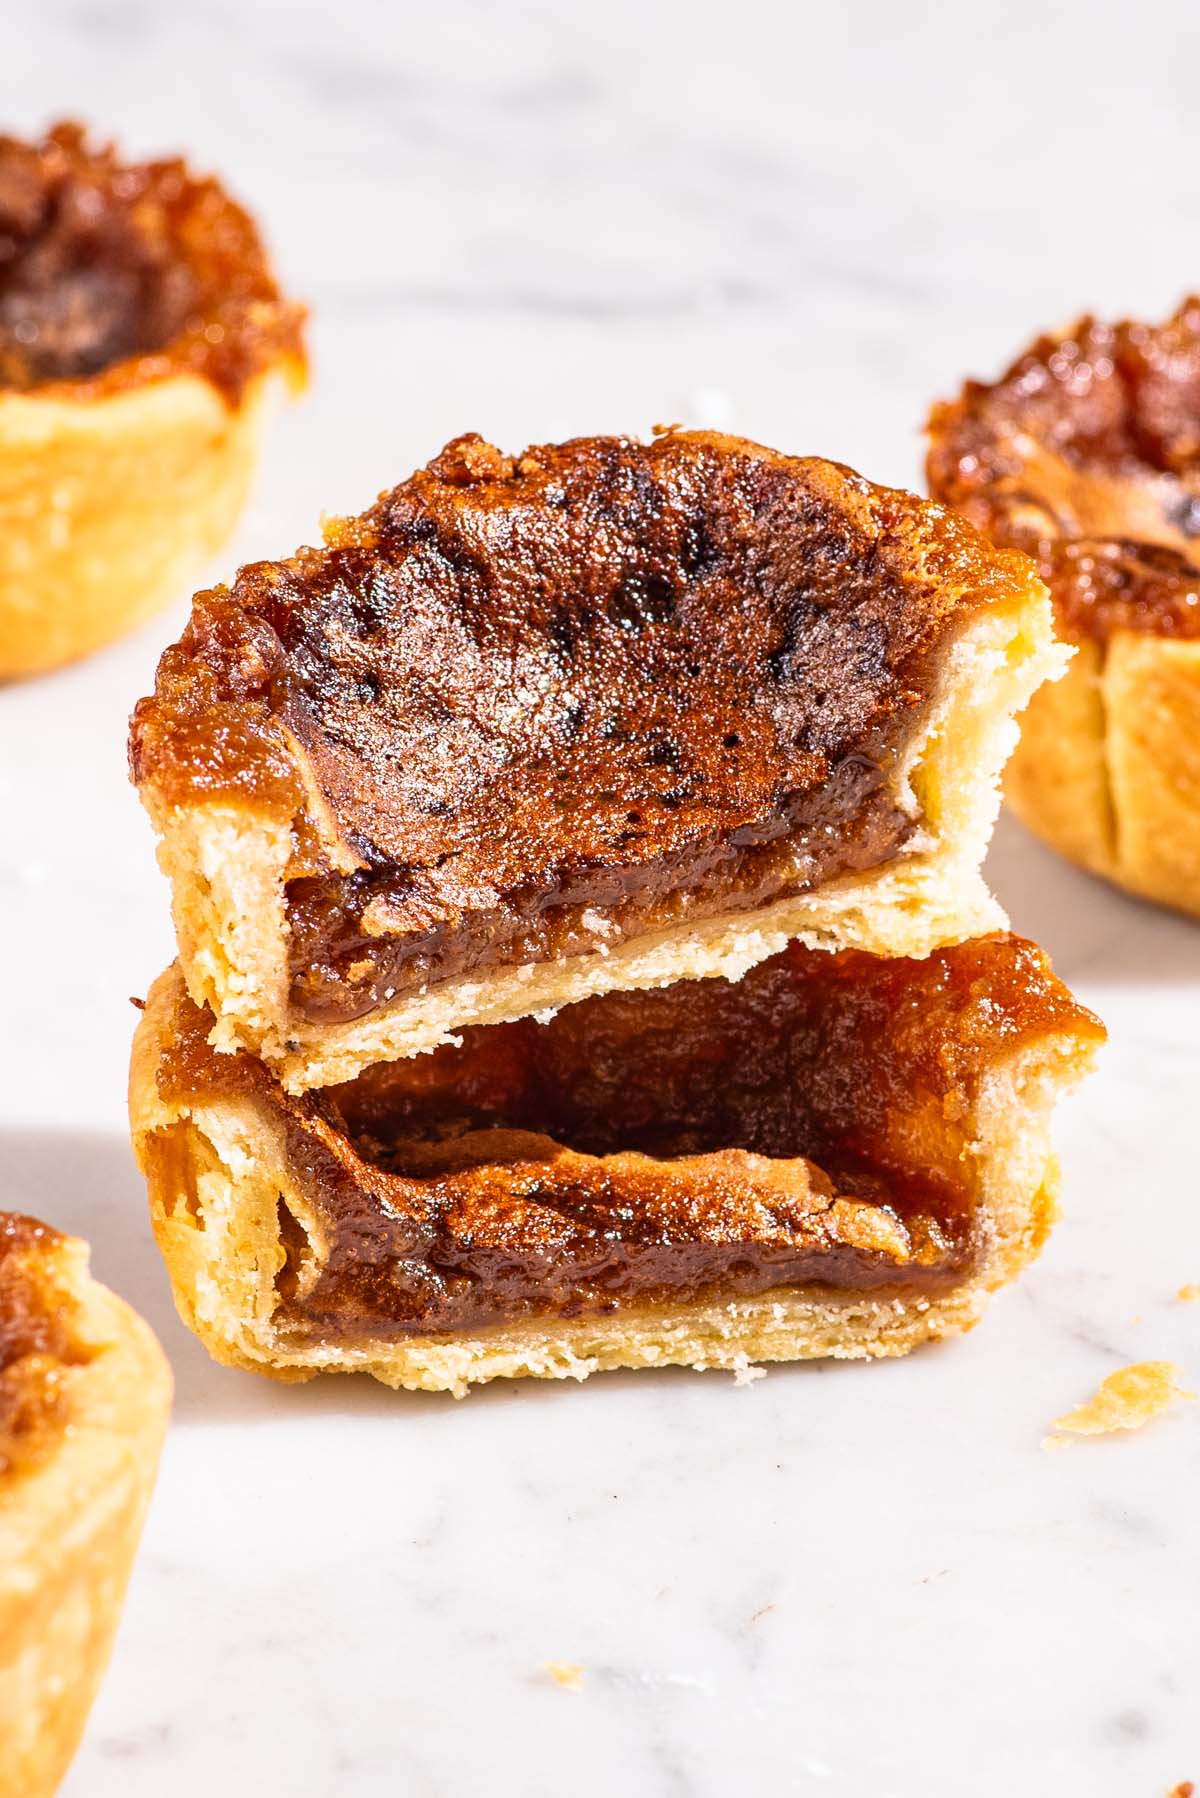
I've never seen a butter tart baked in a mini pastry tin and these are no exception. They're either made in a muffin tin or with store-bought shells. You just need a 12-cup muffin tin for this recipe, and the pie crust is rolled out and cut into rounds before being pressed into the muffin cups. There's no need for a blind bake because the tarts are so small. Note that the filling will bubble up during baking, and that's normal. It's just how traditional butter tarts are.
I tested this recipe based on the handwritten version from my husband's grandmother, who was from Saskatchewan. We've shared several of her time-tested recipes and while they always turn out perfectly, we carefully test each for accurate measurements, baking time, temperature, and dish sizes before sharing.
Ingredients You'll Need and Why
Raisins aren't shown here, but they are included in the recipe card as an optional addition. These are our notes from recipe testing. You can find the full recipe card below with complete measurements and instructions.
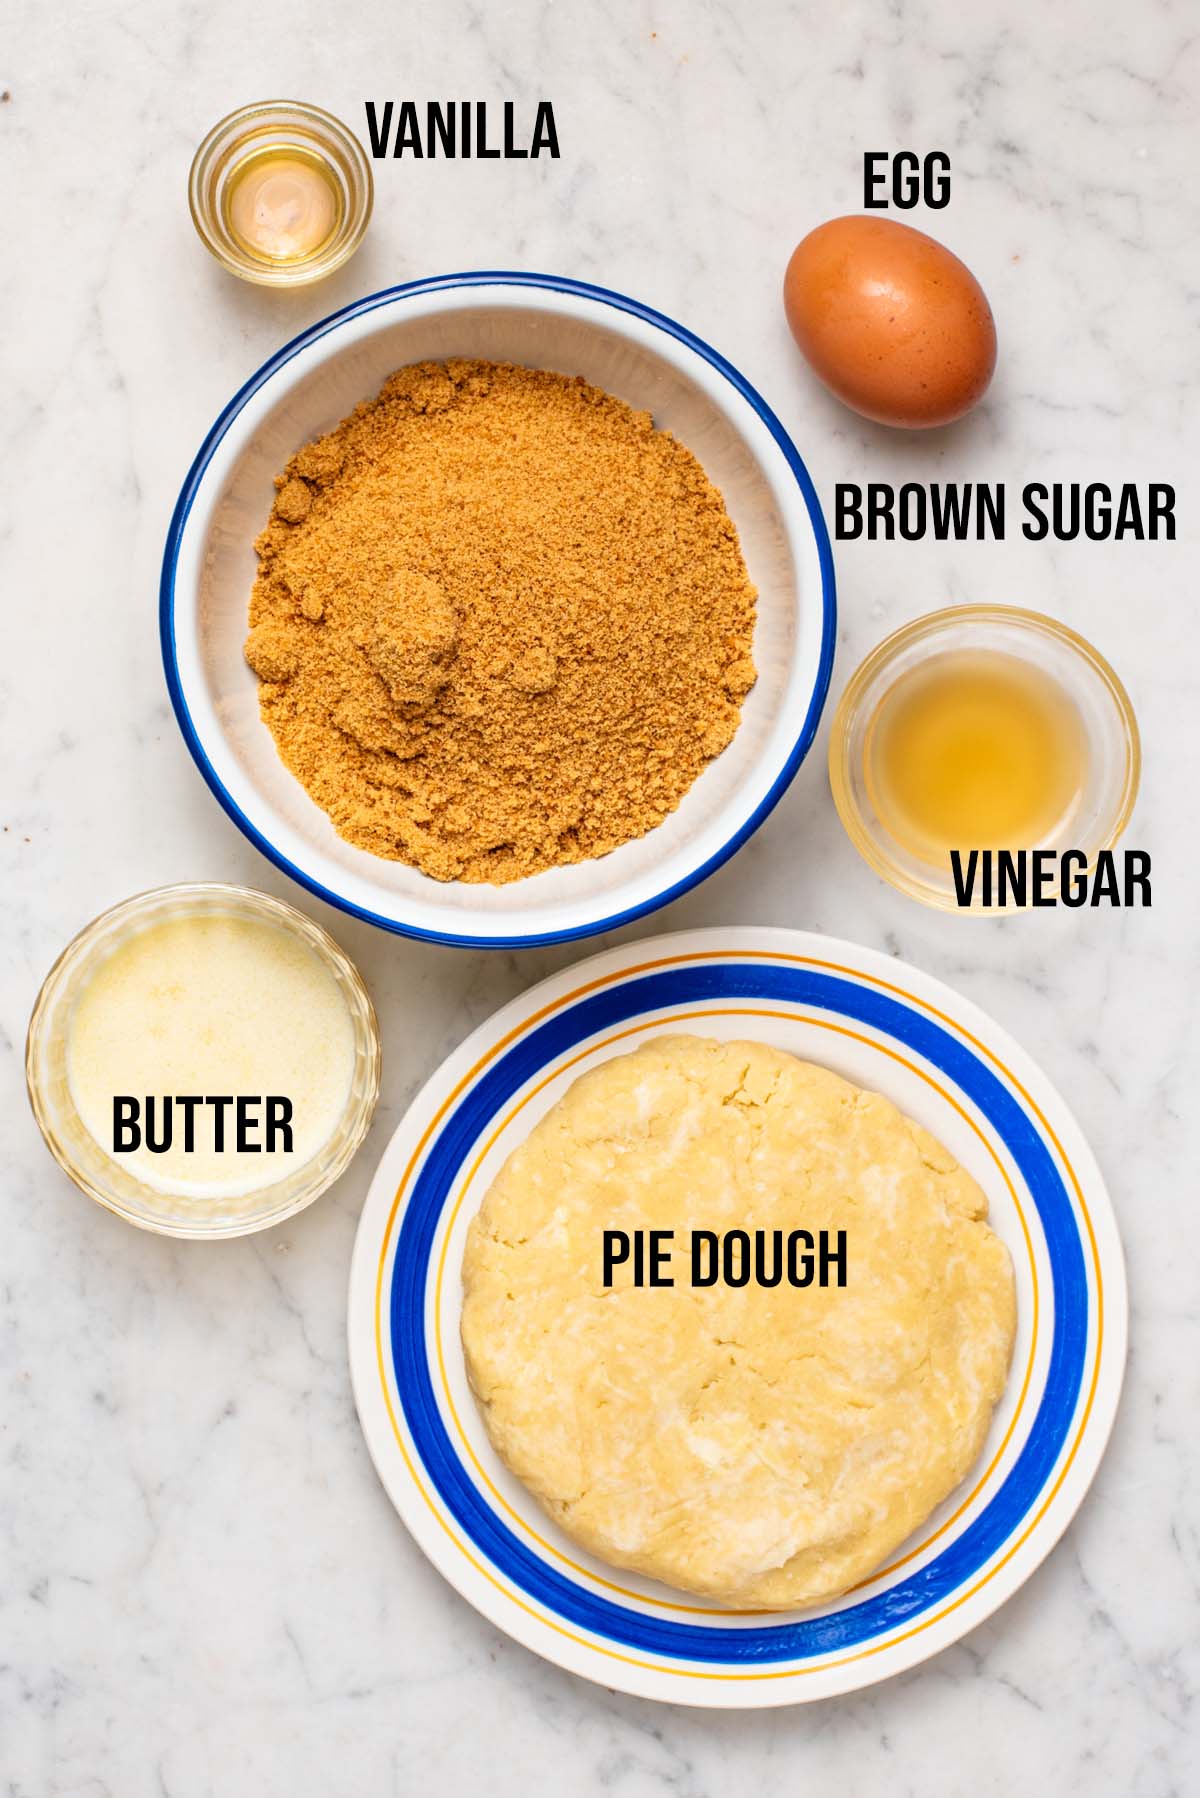
- Pie dough: pictured is our all-butter pie dough, but you could also try sourdough pie crust or use your favourite dough. Store-bought is perfectly fine. You can also use store-bought mini tart shells and skip the muffin tin altogether.
- Brown sugar: use light or dark brown sugar. Dark will make for a slightly more toffee-like butter tart, so choose based on whether you prefer the filling a little lighter or darker.
- Egg: this should be a large egg at room temperature. To quickly bring refrigerated eggs up to room temperature, submerge them in warm water for 10 minutes.
- Butter: for the best flavour and texture, use real butter (it's right there in the name!) and note that the filling will be greasy if margarine is substituted. If you only have unsalted butter, add a pinch of salt to the mixture.
- Vinegar: use apple cider vinegar or 5% strength white vinegar. It might seem like a strange addition if it's your first time making butter tarts, but it cuts through the sweetness and you can't taste it at all once the tarts are baked.
- Vanilla: a little vanilla extract, as usual, boosts flavour. Use vanilla paste or powder if preferred.
- Raisins: optional, and some people swear by adding them. It's completely up to you and really based on whether you like raisins or not!
Use the JUMP TO RECIPE button at the top, or scroll to the bottom of the post to see the printable recipe card with full ingredient measurements and complete instructions.
How to Make Butter Tarts
It's really not a difficult recipe to make. The pastry is a little fiddly but you can skip that by buying pastry shells and using them instead if you don't want to make pie dough from scratch.
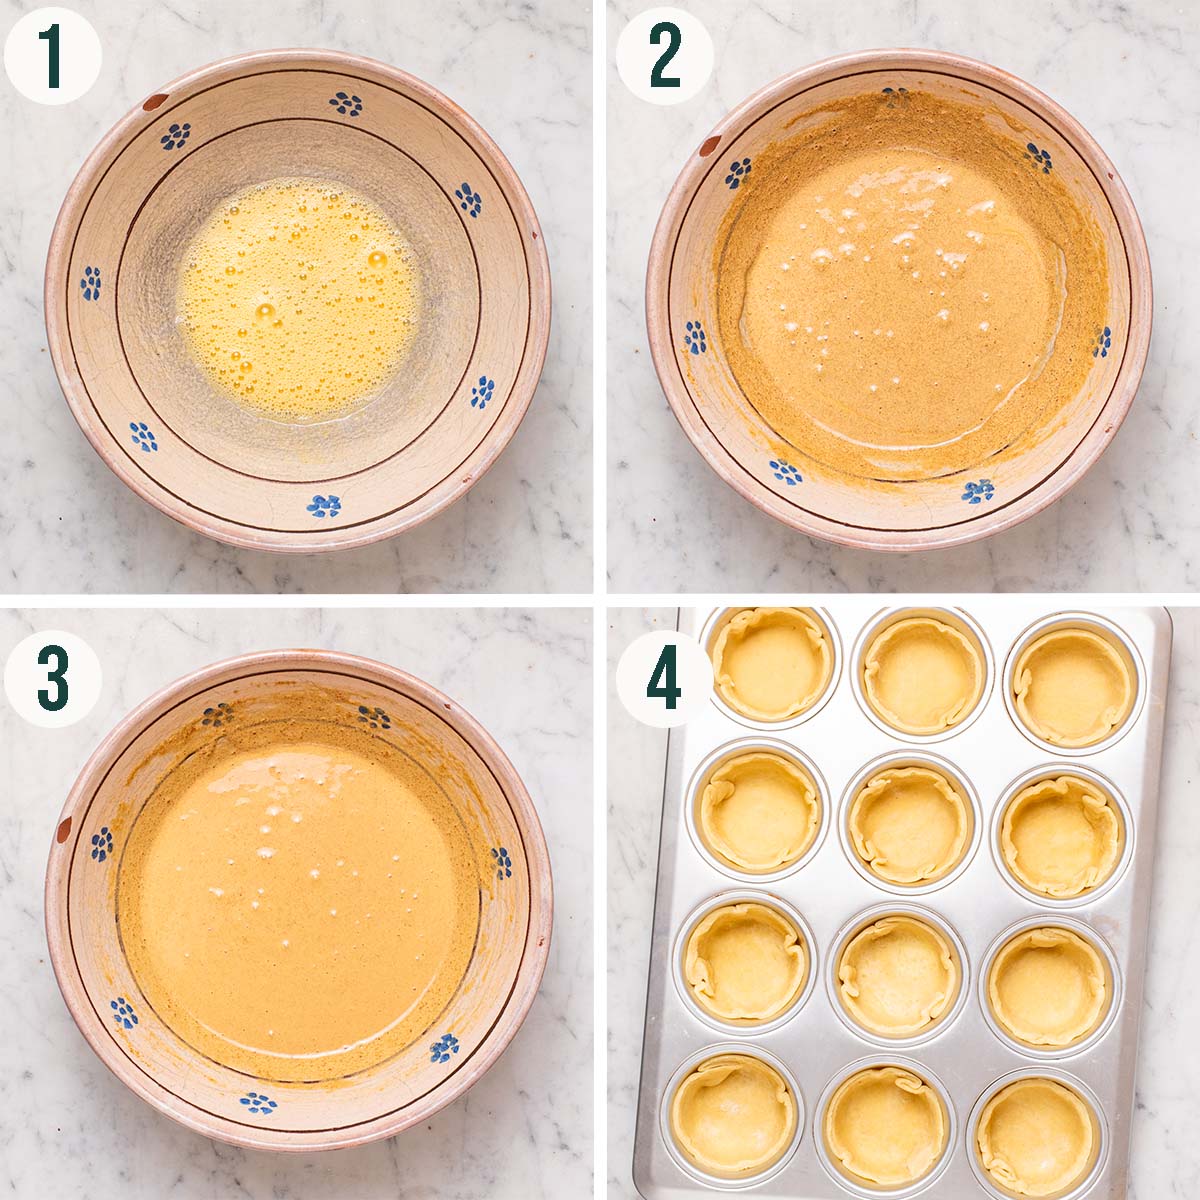
Step 1: beat the egg until very foamy. You can use electric beaters for this but we use a balloon whisk, which is just as fast and a bit less fuss.
Step 2: beat in the sugar to combine. It should be lighter in colour and the volume should increase when it's fully incorporated. Whisk in the vinegar and vanilla. It will smell a little like vinegar at this point - don't worry, that's normal.
Related: Maple Butter Tarts
Step 3: stir in the melted butter to combine. If adding raisins, stir them in now and break up any clumps before adding. Fresh fruit can't be added to butter tarts.
Step 4: roll out the pie dough and cut it into small rounds, then press into muffin cups. As with any pie or tart, there's no need to grease the tin beforehand, but if you're worried about sticking, you can add a small strip of baking paper around the sides of the muffin cups, between the top edge of the pastry and the metal.
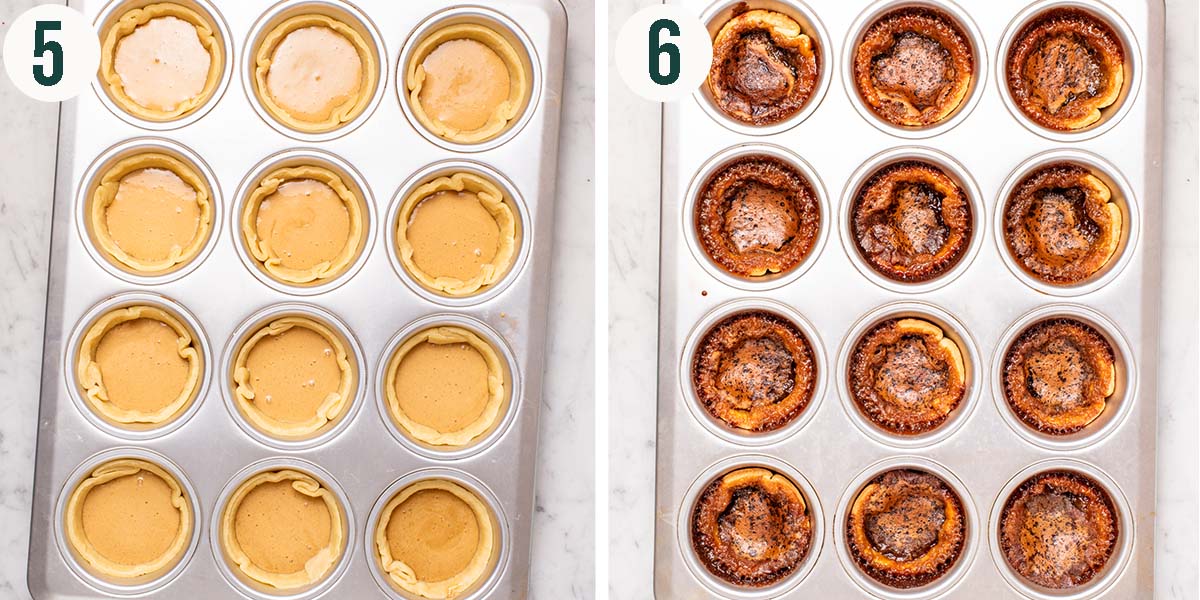
Step 5: pour the filling into the pastry shells, trying to get the amounts as even as possible. They should be a little over half-full. The filling will bubble up as it bakes so you want to leave some space - don't fill the pastry shells right to the top!
Step 6: bake until golden brown and the pastry is crisp. These are baked on the bottom rack of the oven, much like many pie recipes, so that the pastry is crisp throughout. If you don't follow the recipe in terms of the hot start and baking on the bottom rack, the crust will be soft.
Expert Tips for the Best Tarts
- Make the pastry in advance: if you're using from-scratch pie dough, remember that it needs to be made at least a few hours in advance so that it has time to chill. If using frozen, take it out of the freezer and thaw it in the fridge overnight before starting the pastries.
- Don't worry about bubbling: any butter tart recipe you see that has a perfectly smooth top is simply under-baked (to an extraordinary degree) and frankly, that author is misrepresenting the recipe by doing that. They will always bubble up during baking unless you use a completely different method, like a water bath, but then you'll miss out on the crisp pastry.
- Start hot: don't skip it. Trying to bake the tarts at 350 for the full bake will give you soft, crumbly pastry that's missing the flakiness that good pie dough should have.
- Bake on the bottom rack: because there's no blind bake (see sweet shortcrust) it's best to bake the tarts low in the oven so that the bottom crust can bake through with the extra heat near the base.
- Double the recipe: the recipe as written makes one dozen butter tarts, but we prefer to make 24 and freeze half for later. You can easily scale up the card by clicking the 2x button at the top right of the ingredient list.


Canadian Butter Tarts
Equipment
- Measuring cups and spoons or a digital kitchen scale
- Rolling Pin
- 12-cup muffin tin
- Mixing bowl
- Whisk
- 4-inch (10 cm) round cookie/biscuit cutter
Ingredients
- ½ batch all-butter pie crust, or store-bought, thawed in the fridge
- 1 large egg
- 1 cup brown sugar
- 1 tablespoon apple cider vinegar
- 1 teaspoon vanilla extract
- ¼ cup salted butter, melted and cooled
- 1 ⅓ cup raisins, optional
Instructions
- Make the pie crust in advance as instructed if using homemade, and chill as outlined before use.
- Preheat the oven to 450°F (230°C) and move the rack to the bottom rung.
- Take the chilled pie dough, or thawed store-bought pie dough, and roll it out thinly. Cut into 4-inch (10cm) rounds. Re-roll the dough as needed to get 12 rounds.
- Gently press the rounds into the muffin cups. Some of the pastry will overlap, that's normal. Set this in the fridge while you prepare the filling.
- Beat the egg in a large bowl until foamy, using a whisk or handheld electric mixer.
- Beat in the sugar to combine. The mixture will be thicker and lighter in colour once combined. Whisk in the vinegar and vanilla.
- Whisk in the melted butter. If using raisins, stir them in now.
- Take the muffin tin out of the fridge and pour the filling into the pastry shells, filling each about halfway.
- Important: place the tarts on the bottom rack of the oven and bake at 450°F for 10 minutes, then reduce the heat to 350°F and cook for another 20 to 25 minutes. This is a total of 30 to 35 minutes baking time. Set a timer so that you don't forget to turn the oven temperature down.
- The filling should be just firm to the touch when the tarts are baked. The filling will bubble up during baking. This is normal.
Notes
Nutrition
Nutrition information is an estimate and is provided as a courtesy. For precise nutritional data, please calculate it independently using your preferred nutrition calculator.
This post may contain affiliate links. If you purchase through these links, we may earn a small commission, at no additional cost to you.
 Did you make this recipe?Please consider leaving us a rating and a comment. It helps others find our work, which genuinely supports what we do. Thank you!